“BBQ PIT CLEANING”

“BBQ PIT CLEANING”

My little girl suggested I should show what I would normally do before and during my grilling time to show people how I create my master piece dinners, so here it is.

Getting-ready-to-clean-the-barbecue-pit.

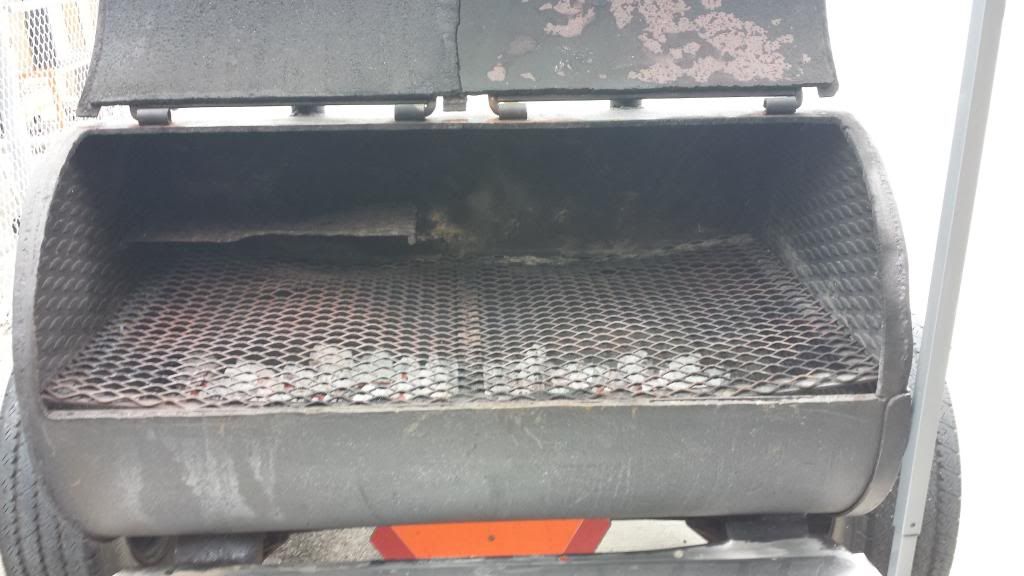
I first start of by cleaning the barbecue pit. Normally I would remove the ashes right after a barbecue after it has cooled off. Doing this prevents rust from forming.


A-better-view-of-the-work-ahead.


I-remove-the-grill-for-easy-access.

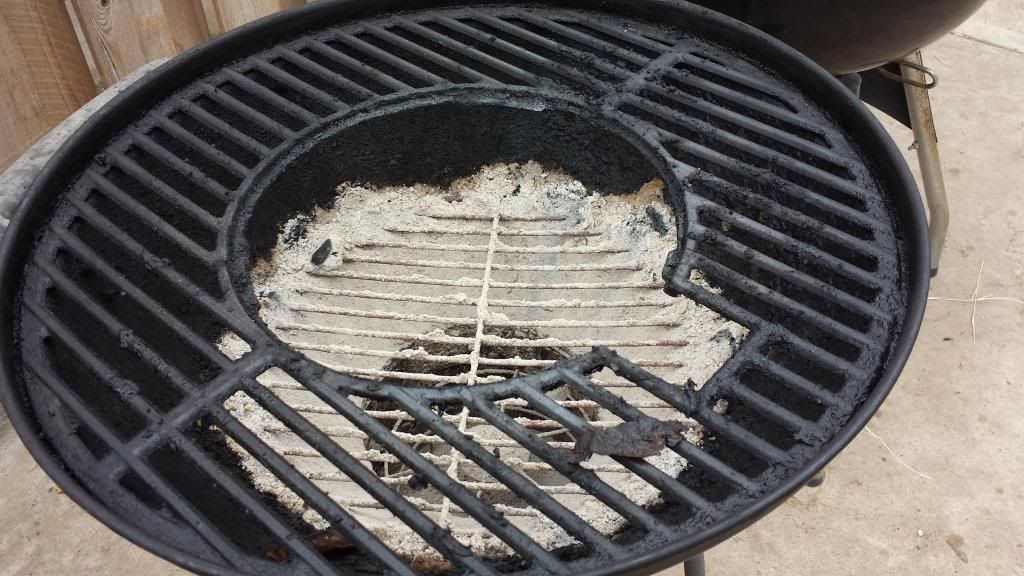
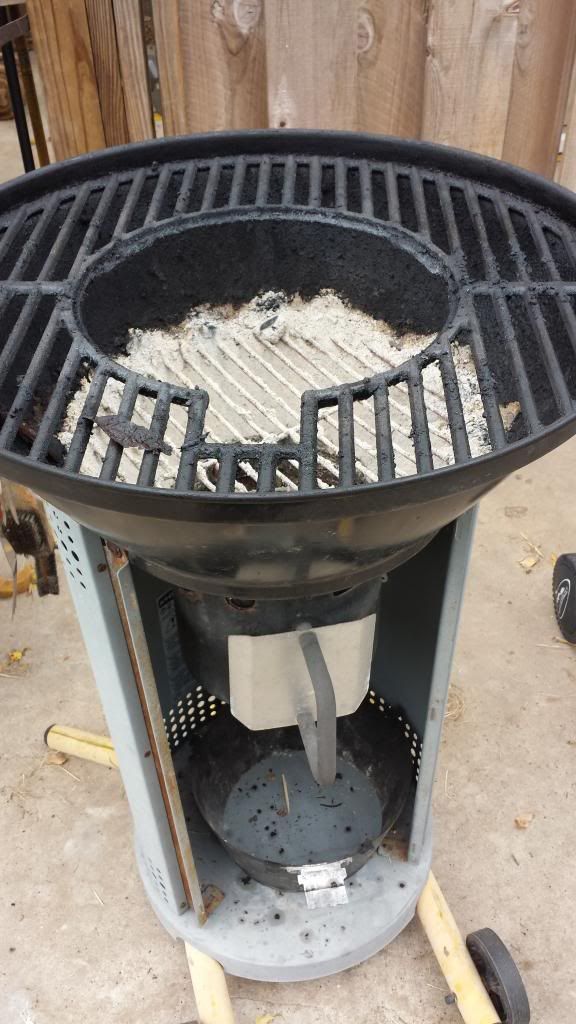
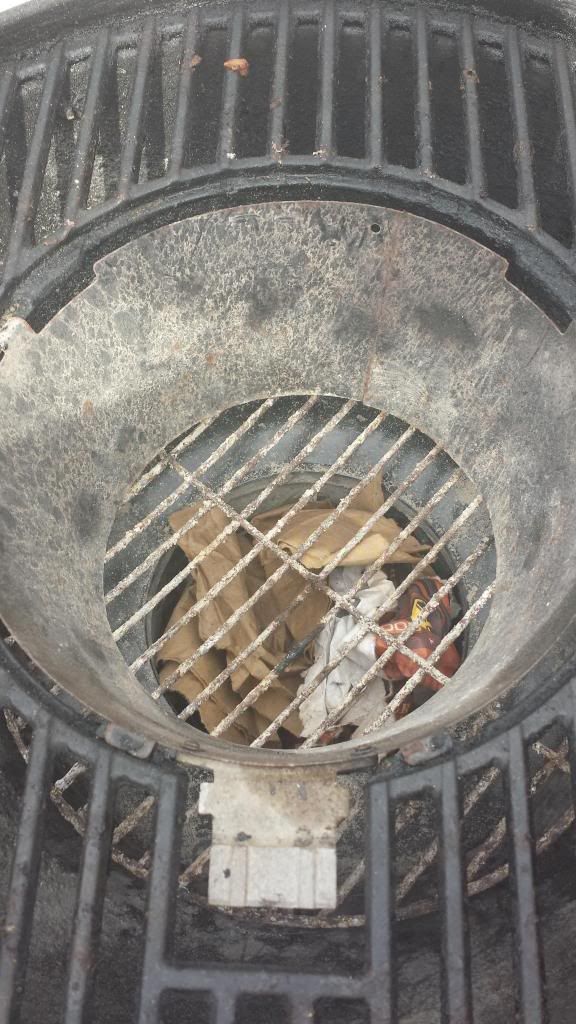
Here I removed the grill section to have an easier access to the base of the pit.


I-brush-off-all-loose-ashes.

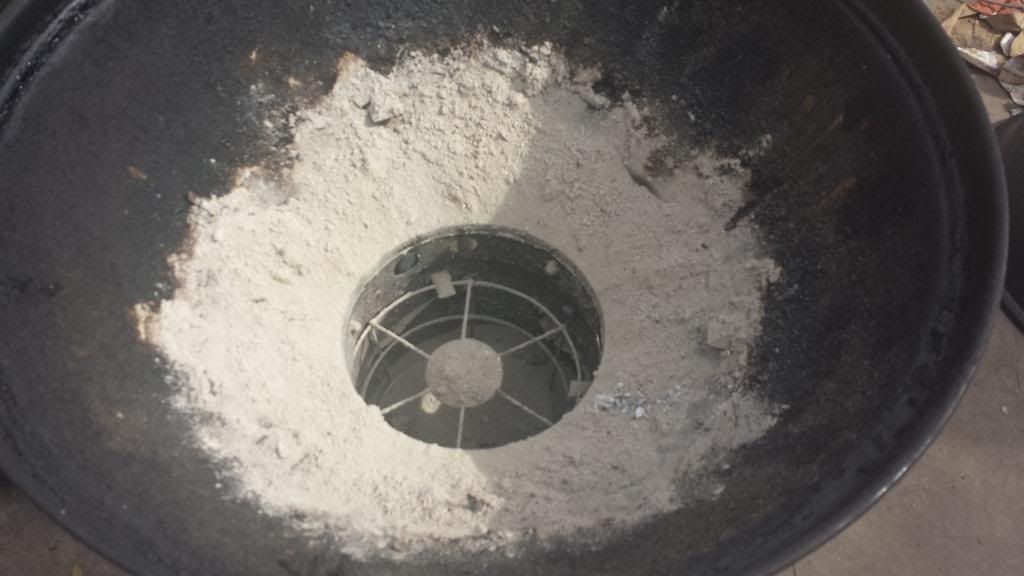
I start by removing all loose ashes first and then remove the stubborn ones with a stiff wire brush.


I-finish-of-with-a-finer-brush.

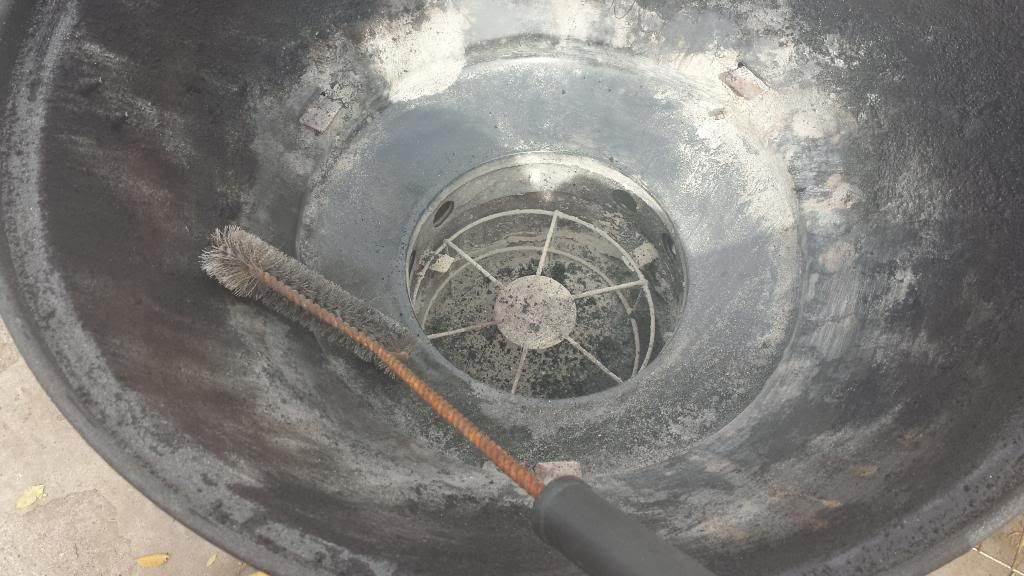
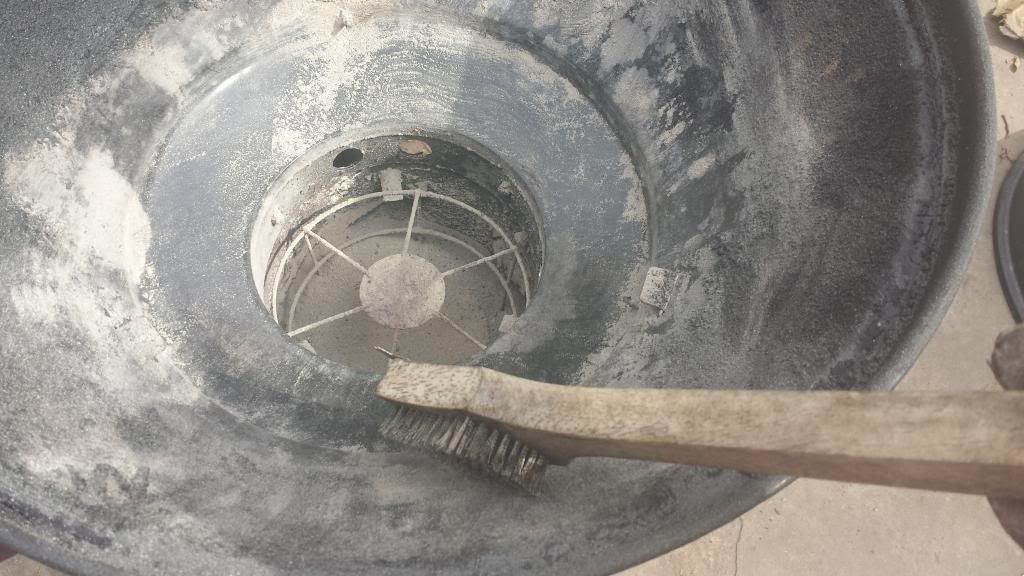
Here I finish off the scrubbing with a finer wire brush that’s shaped better for this type of surface. I then remove the ash container to empty it out and clean it as well.


Added-grill-back.

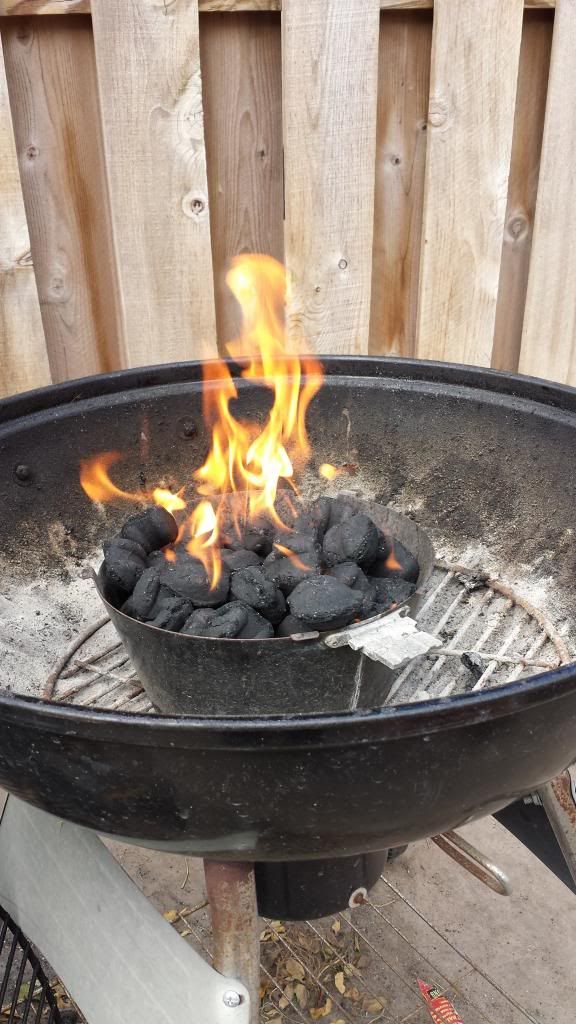
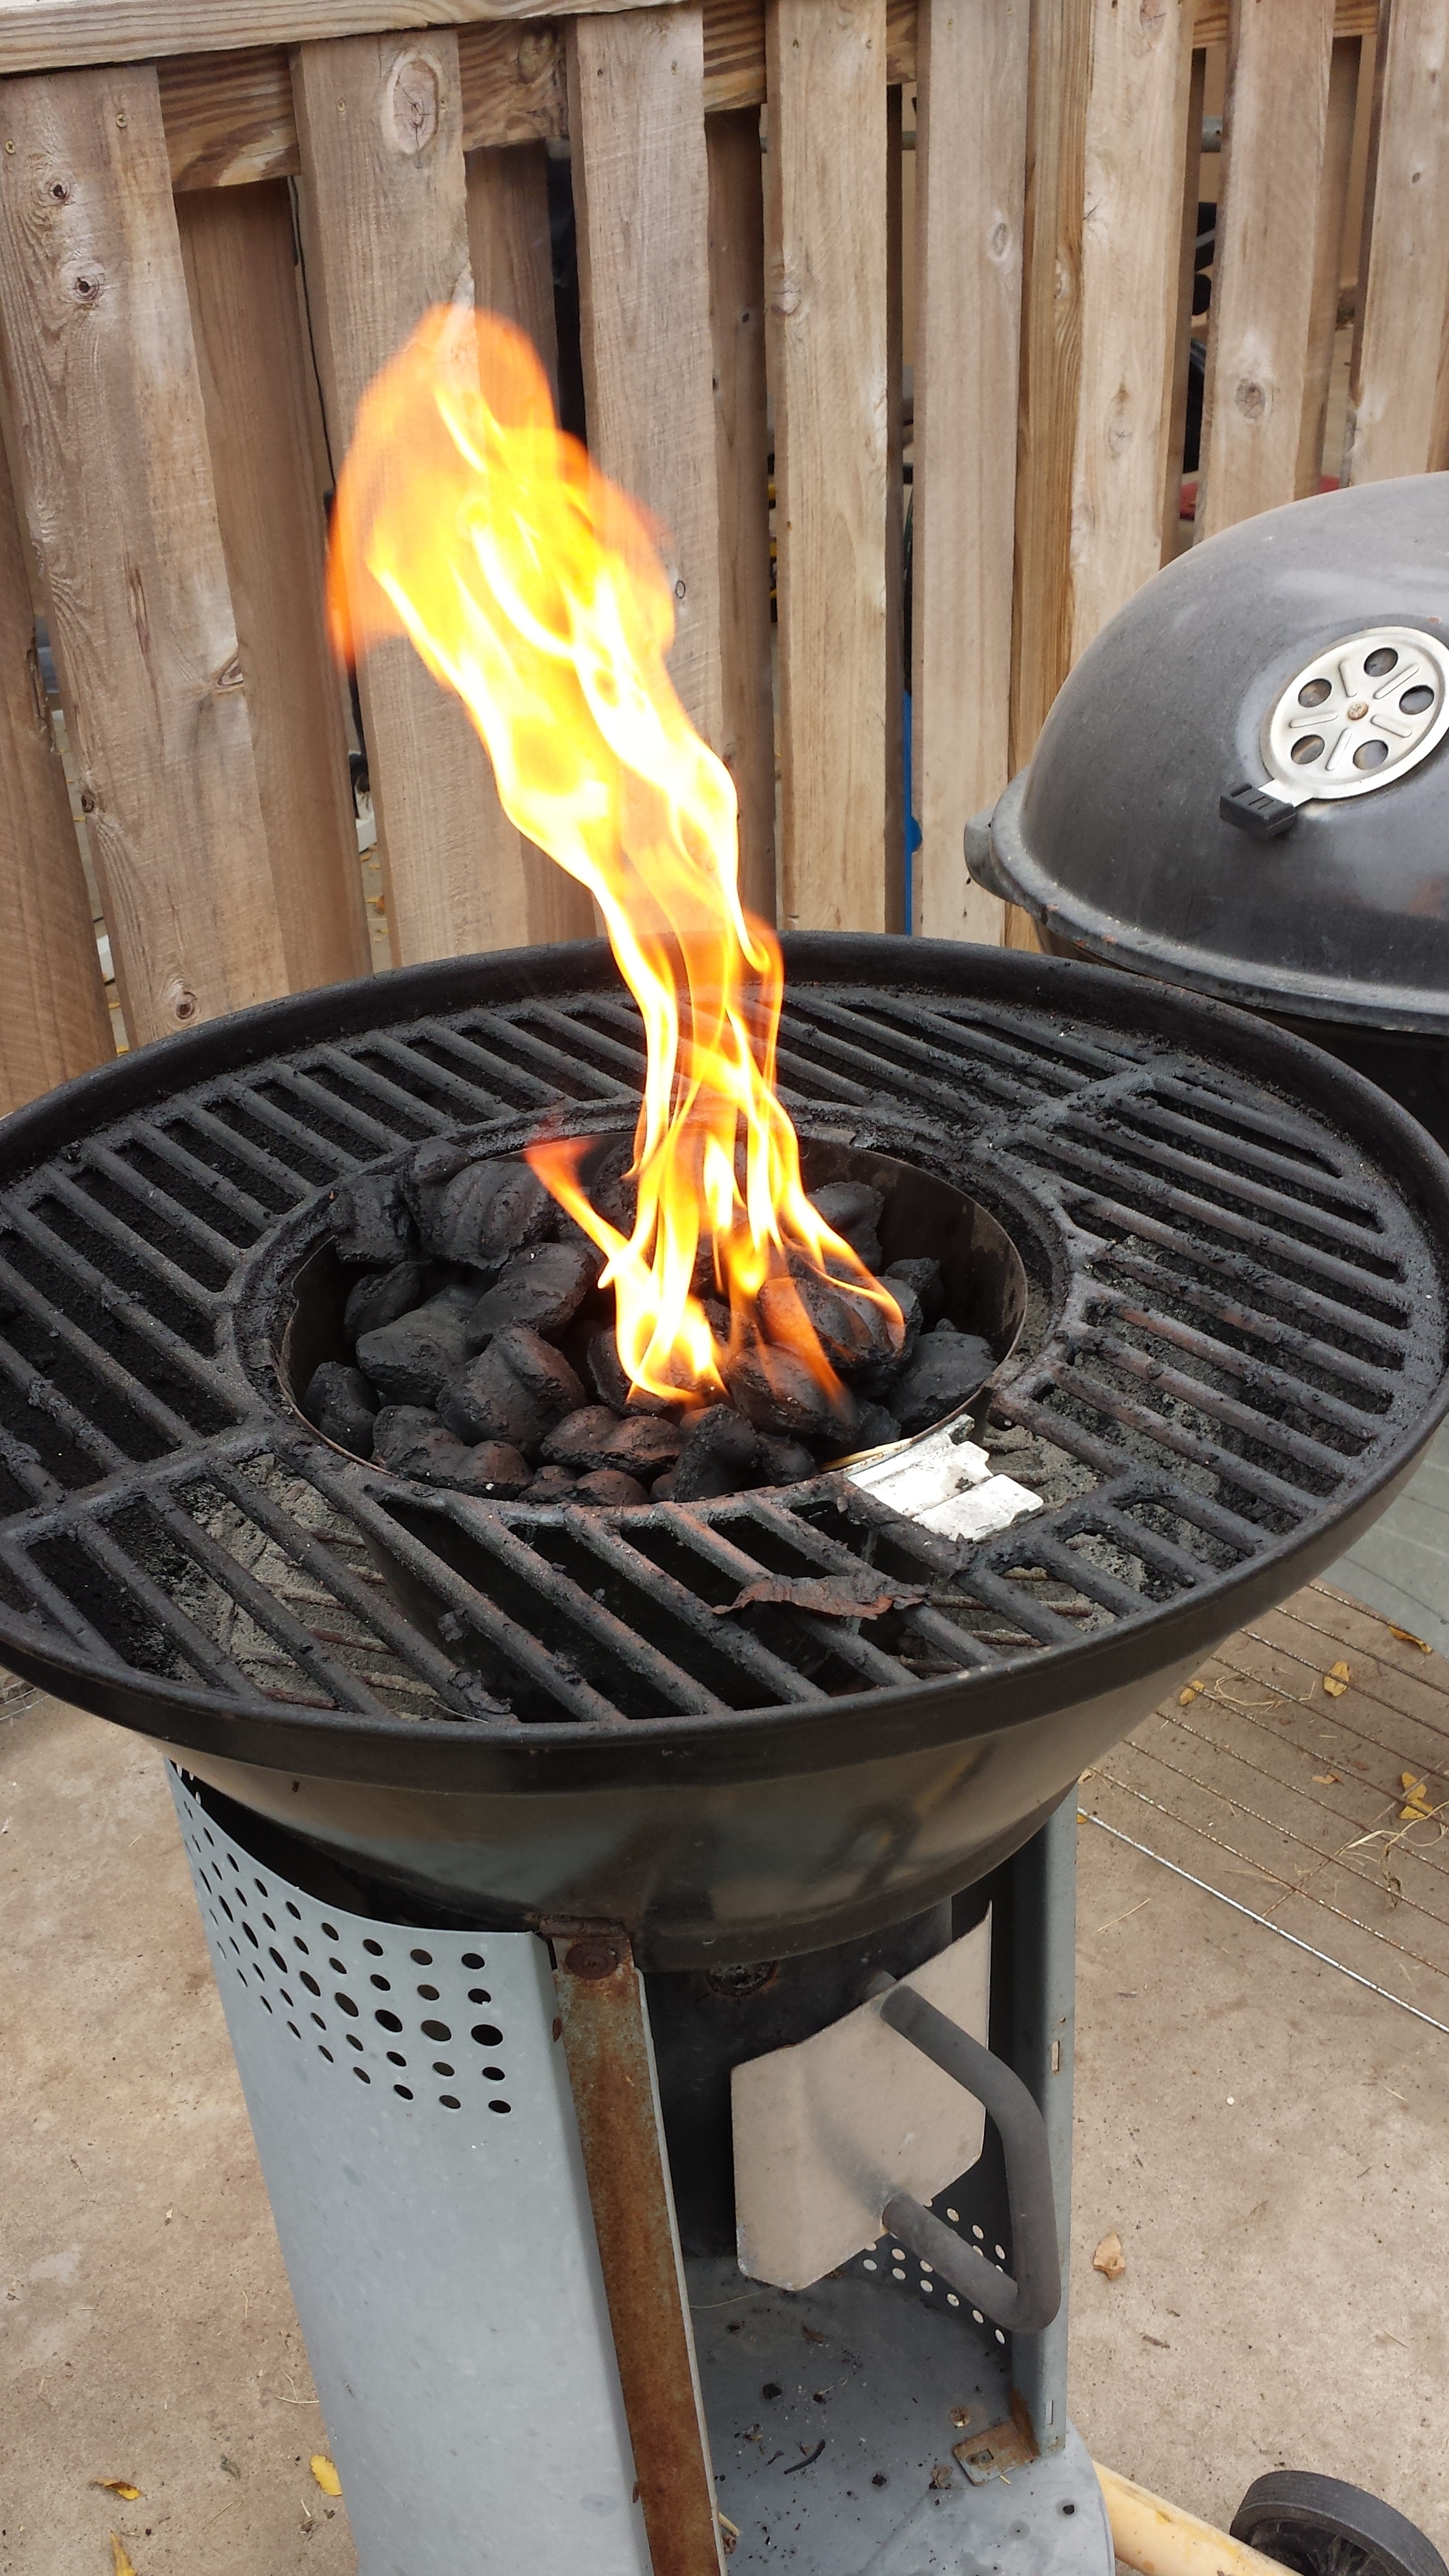
I have added the grill back and I have crumbled parts of the charcoal bag and put them in the ash holder to serve as a way to light the charcoal instead of using lighter fluid. This process of starting the fire works out very well and only adds 5 minutes to the time as opposed to using charcoal fluid.


Almost-ready-to-light-the-fire.

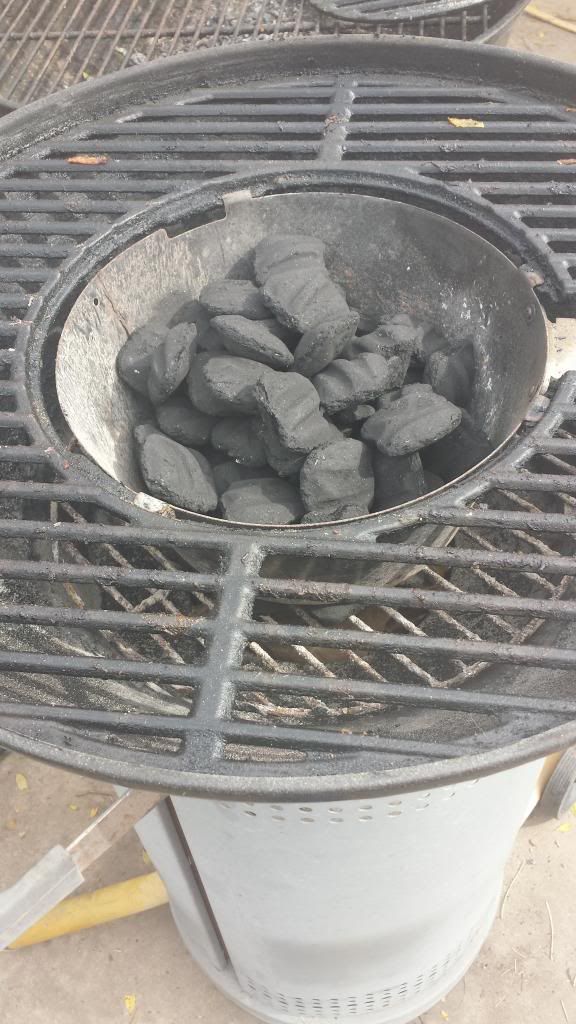
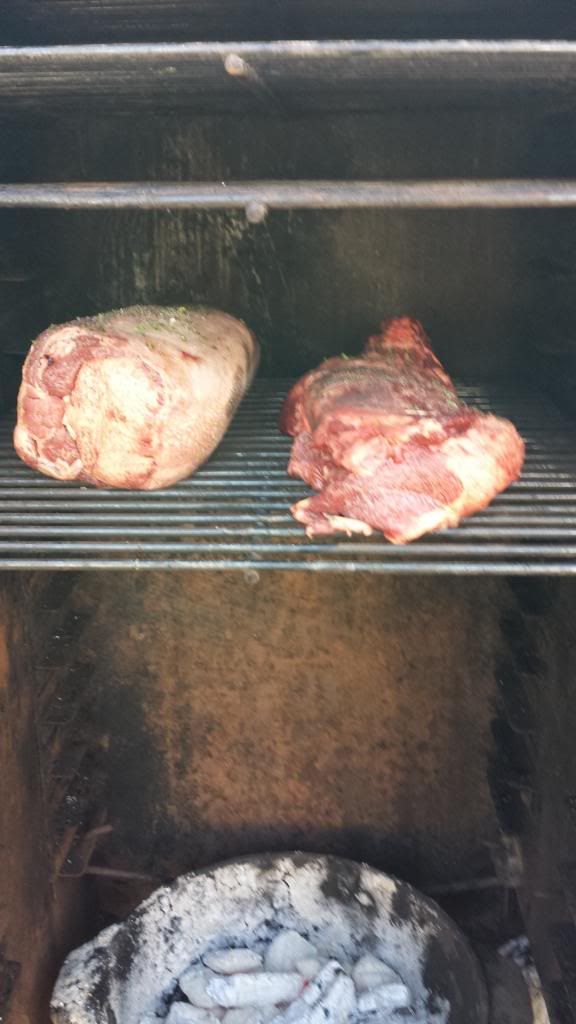
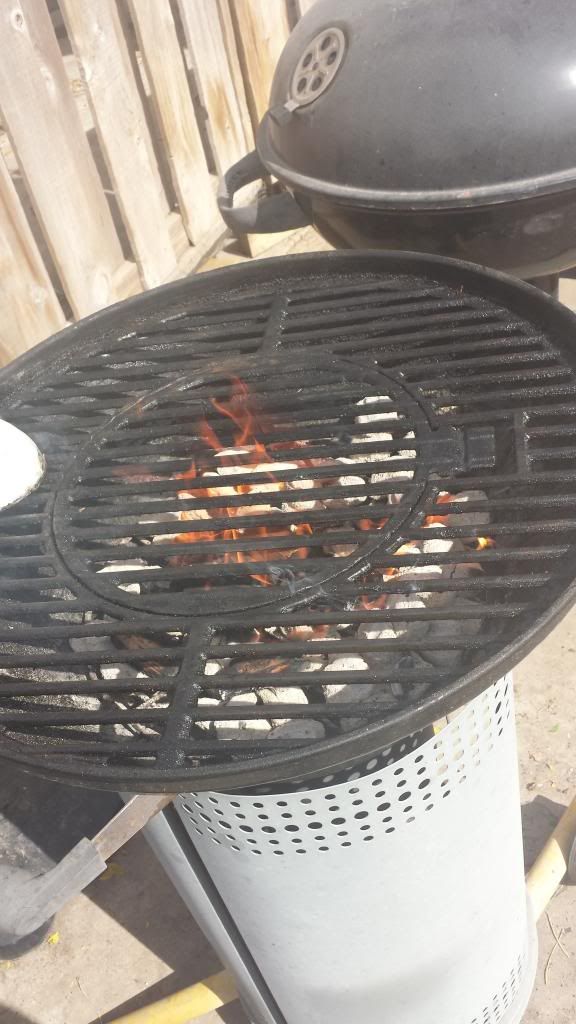
Here we are about as ready as ever for take off as we are ever going to be.


Houston-we-have-ignition!

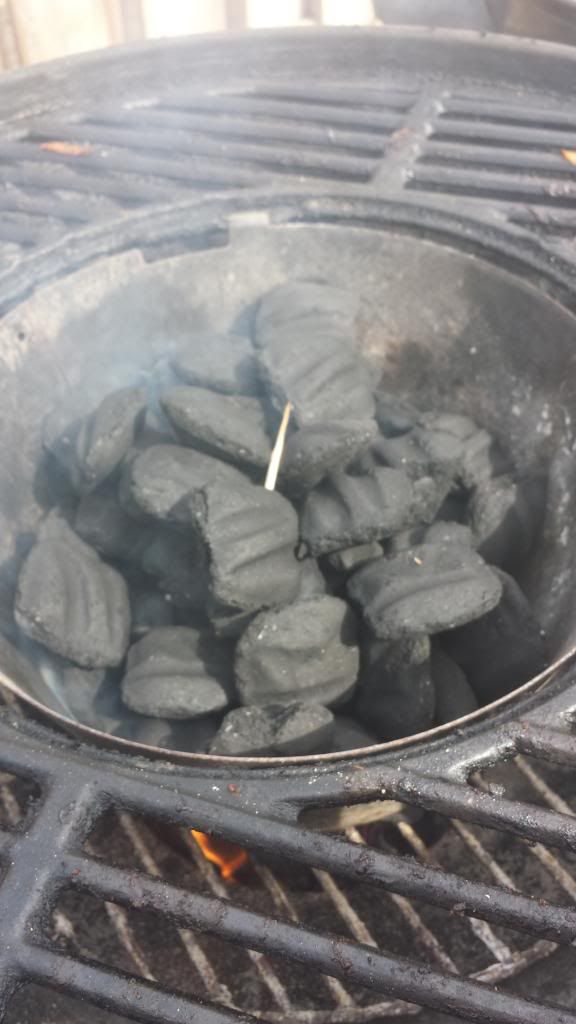
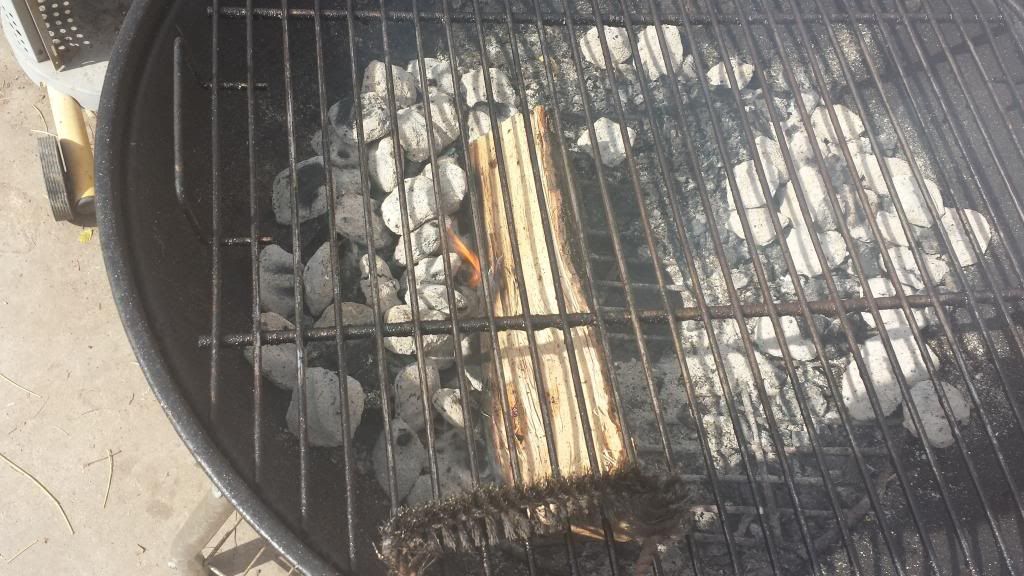
We have a fire! The small stick on the top is a broken match stick. Notice how I didn’t clean the grill the last time I barbecued. I leave it dirty on purpose to prevent rust from forming on the grill. I clean it every time I barbecue after the coals have ashed over and the grill is hot with a wire brush and half an onion.


All-ashed-over.

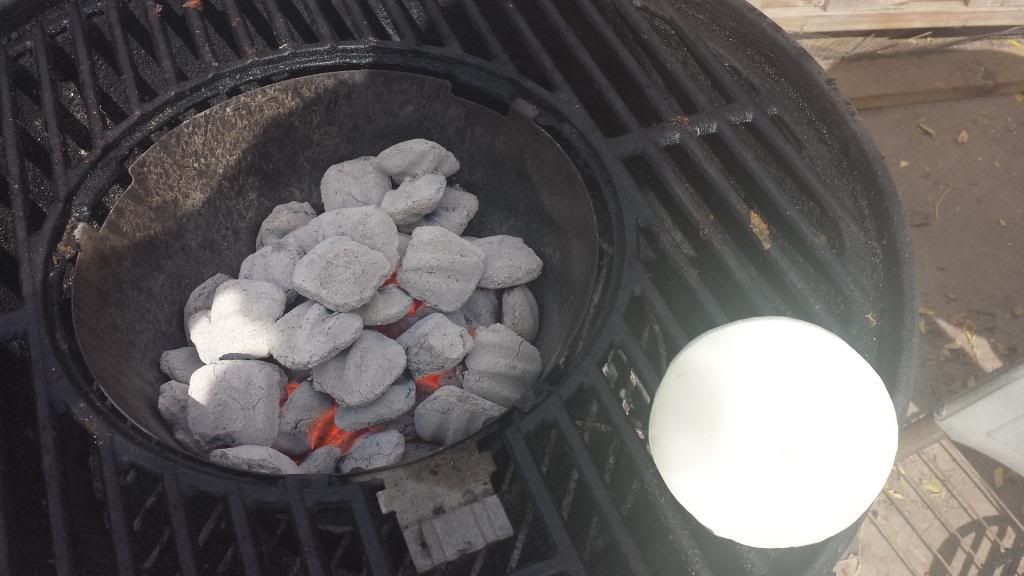
All ashed over and ready for the final stages of prep work. The white circular object on the lower right side of the grill is a hole in the space time continuum….”Oops! Wrong blog!” It is the onion that I will use to wipe down the grill.


Using-an-onion-for-the-final-cleaning-of-the-grill.

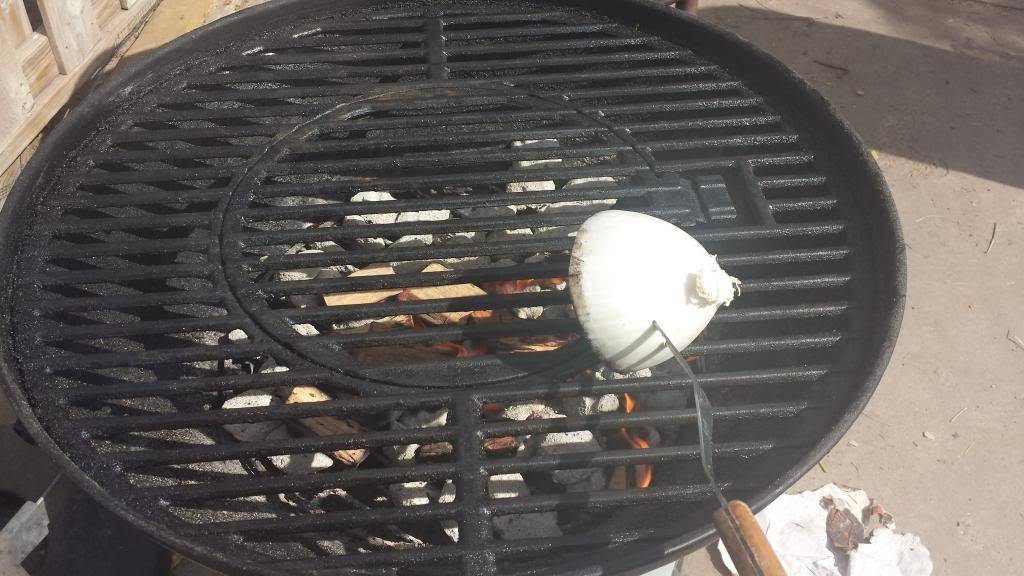
Here I am using the half onion for the final cleaning. This also gives a rich aroma to the meats as well and the surrounding air.


Put-the-lid-on.

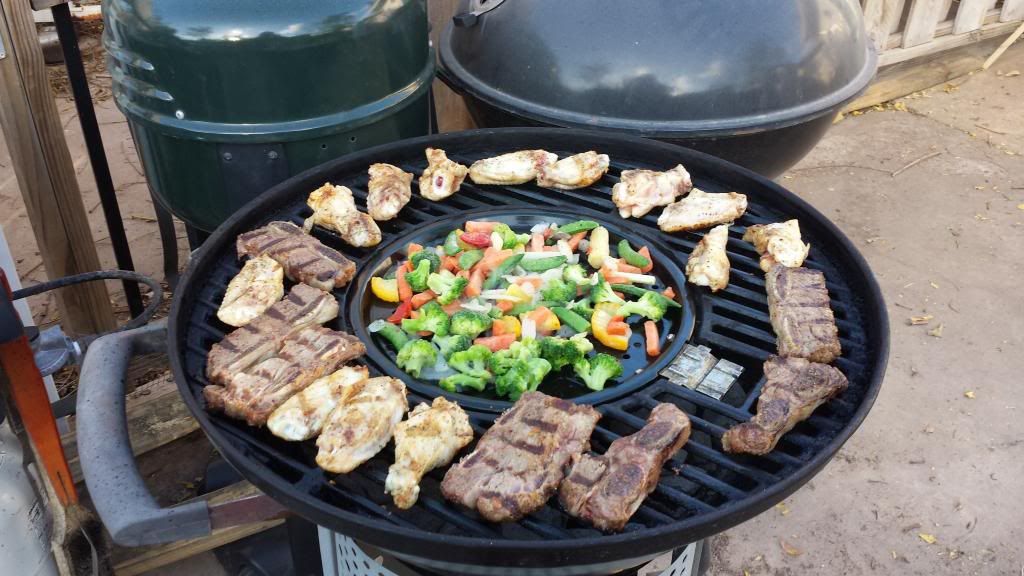
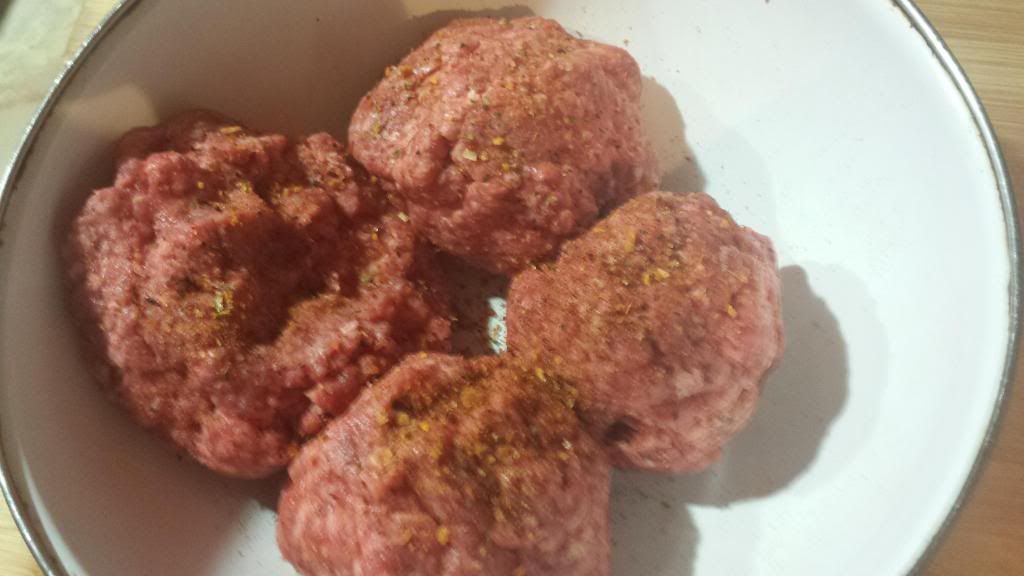
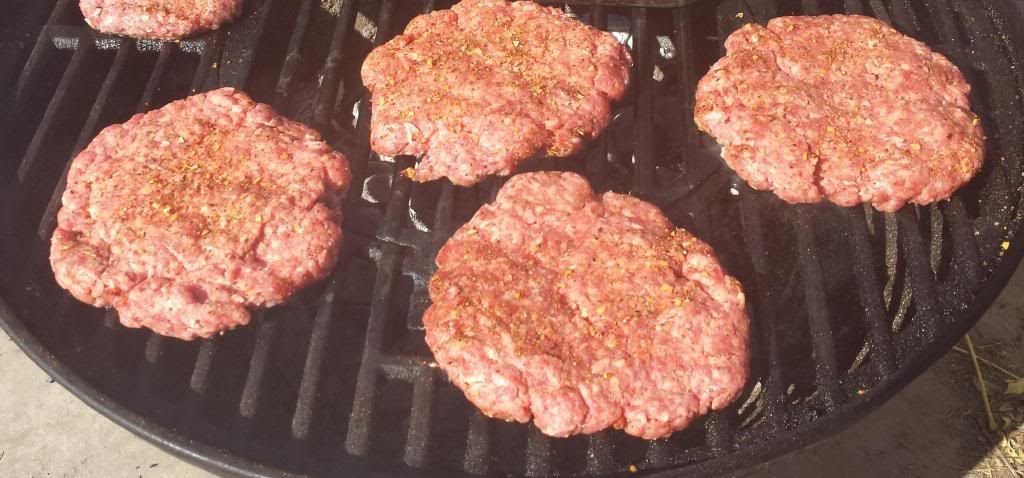
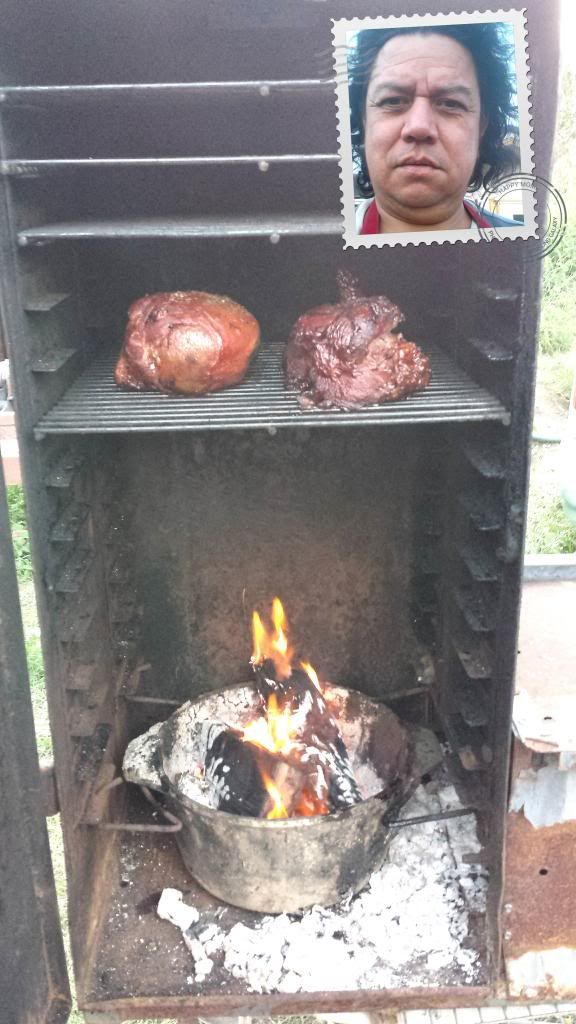
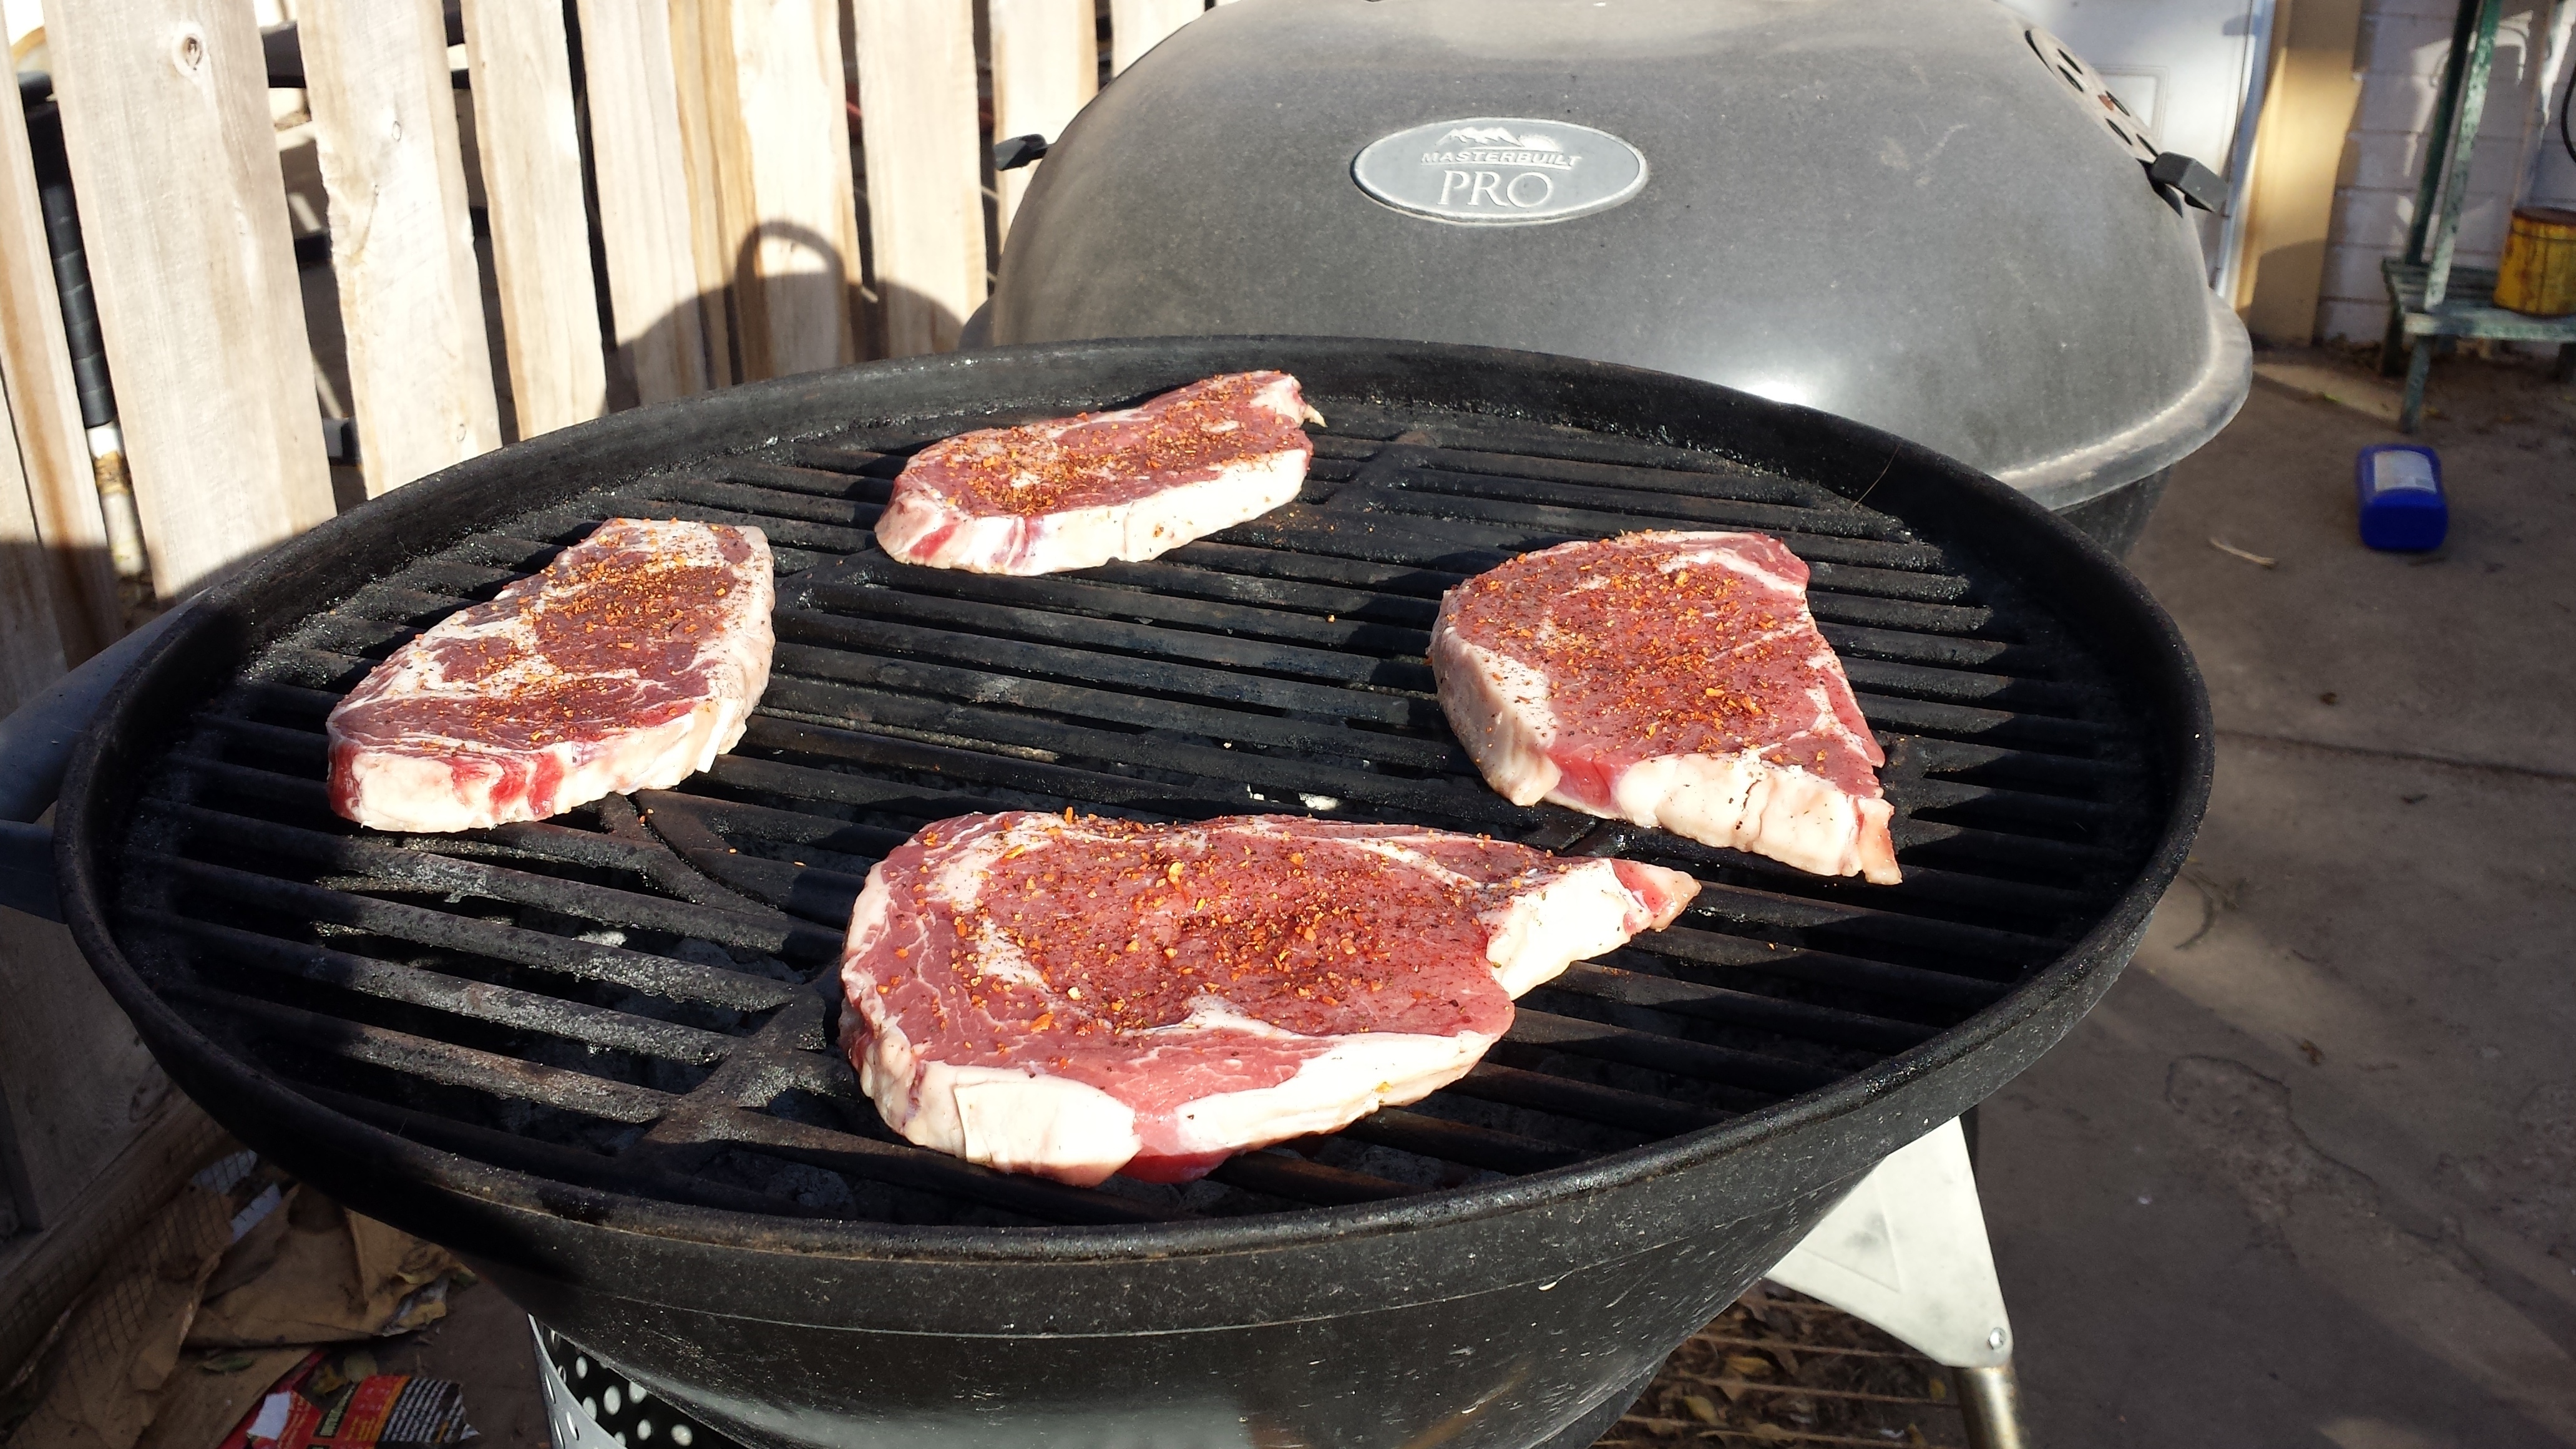
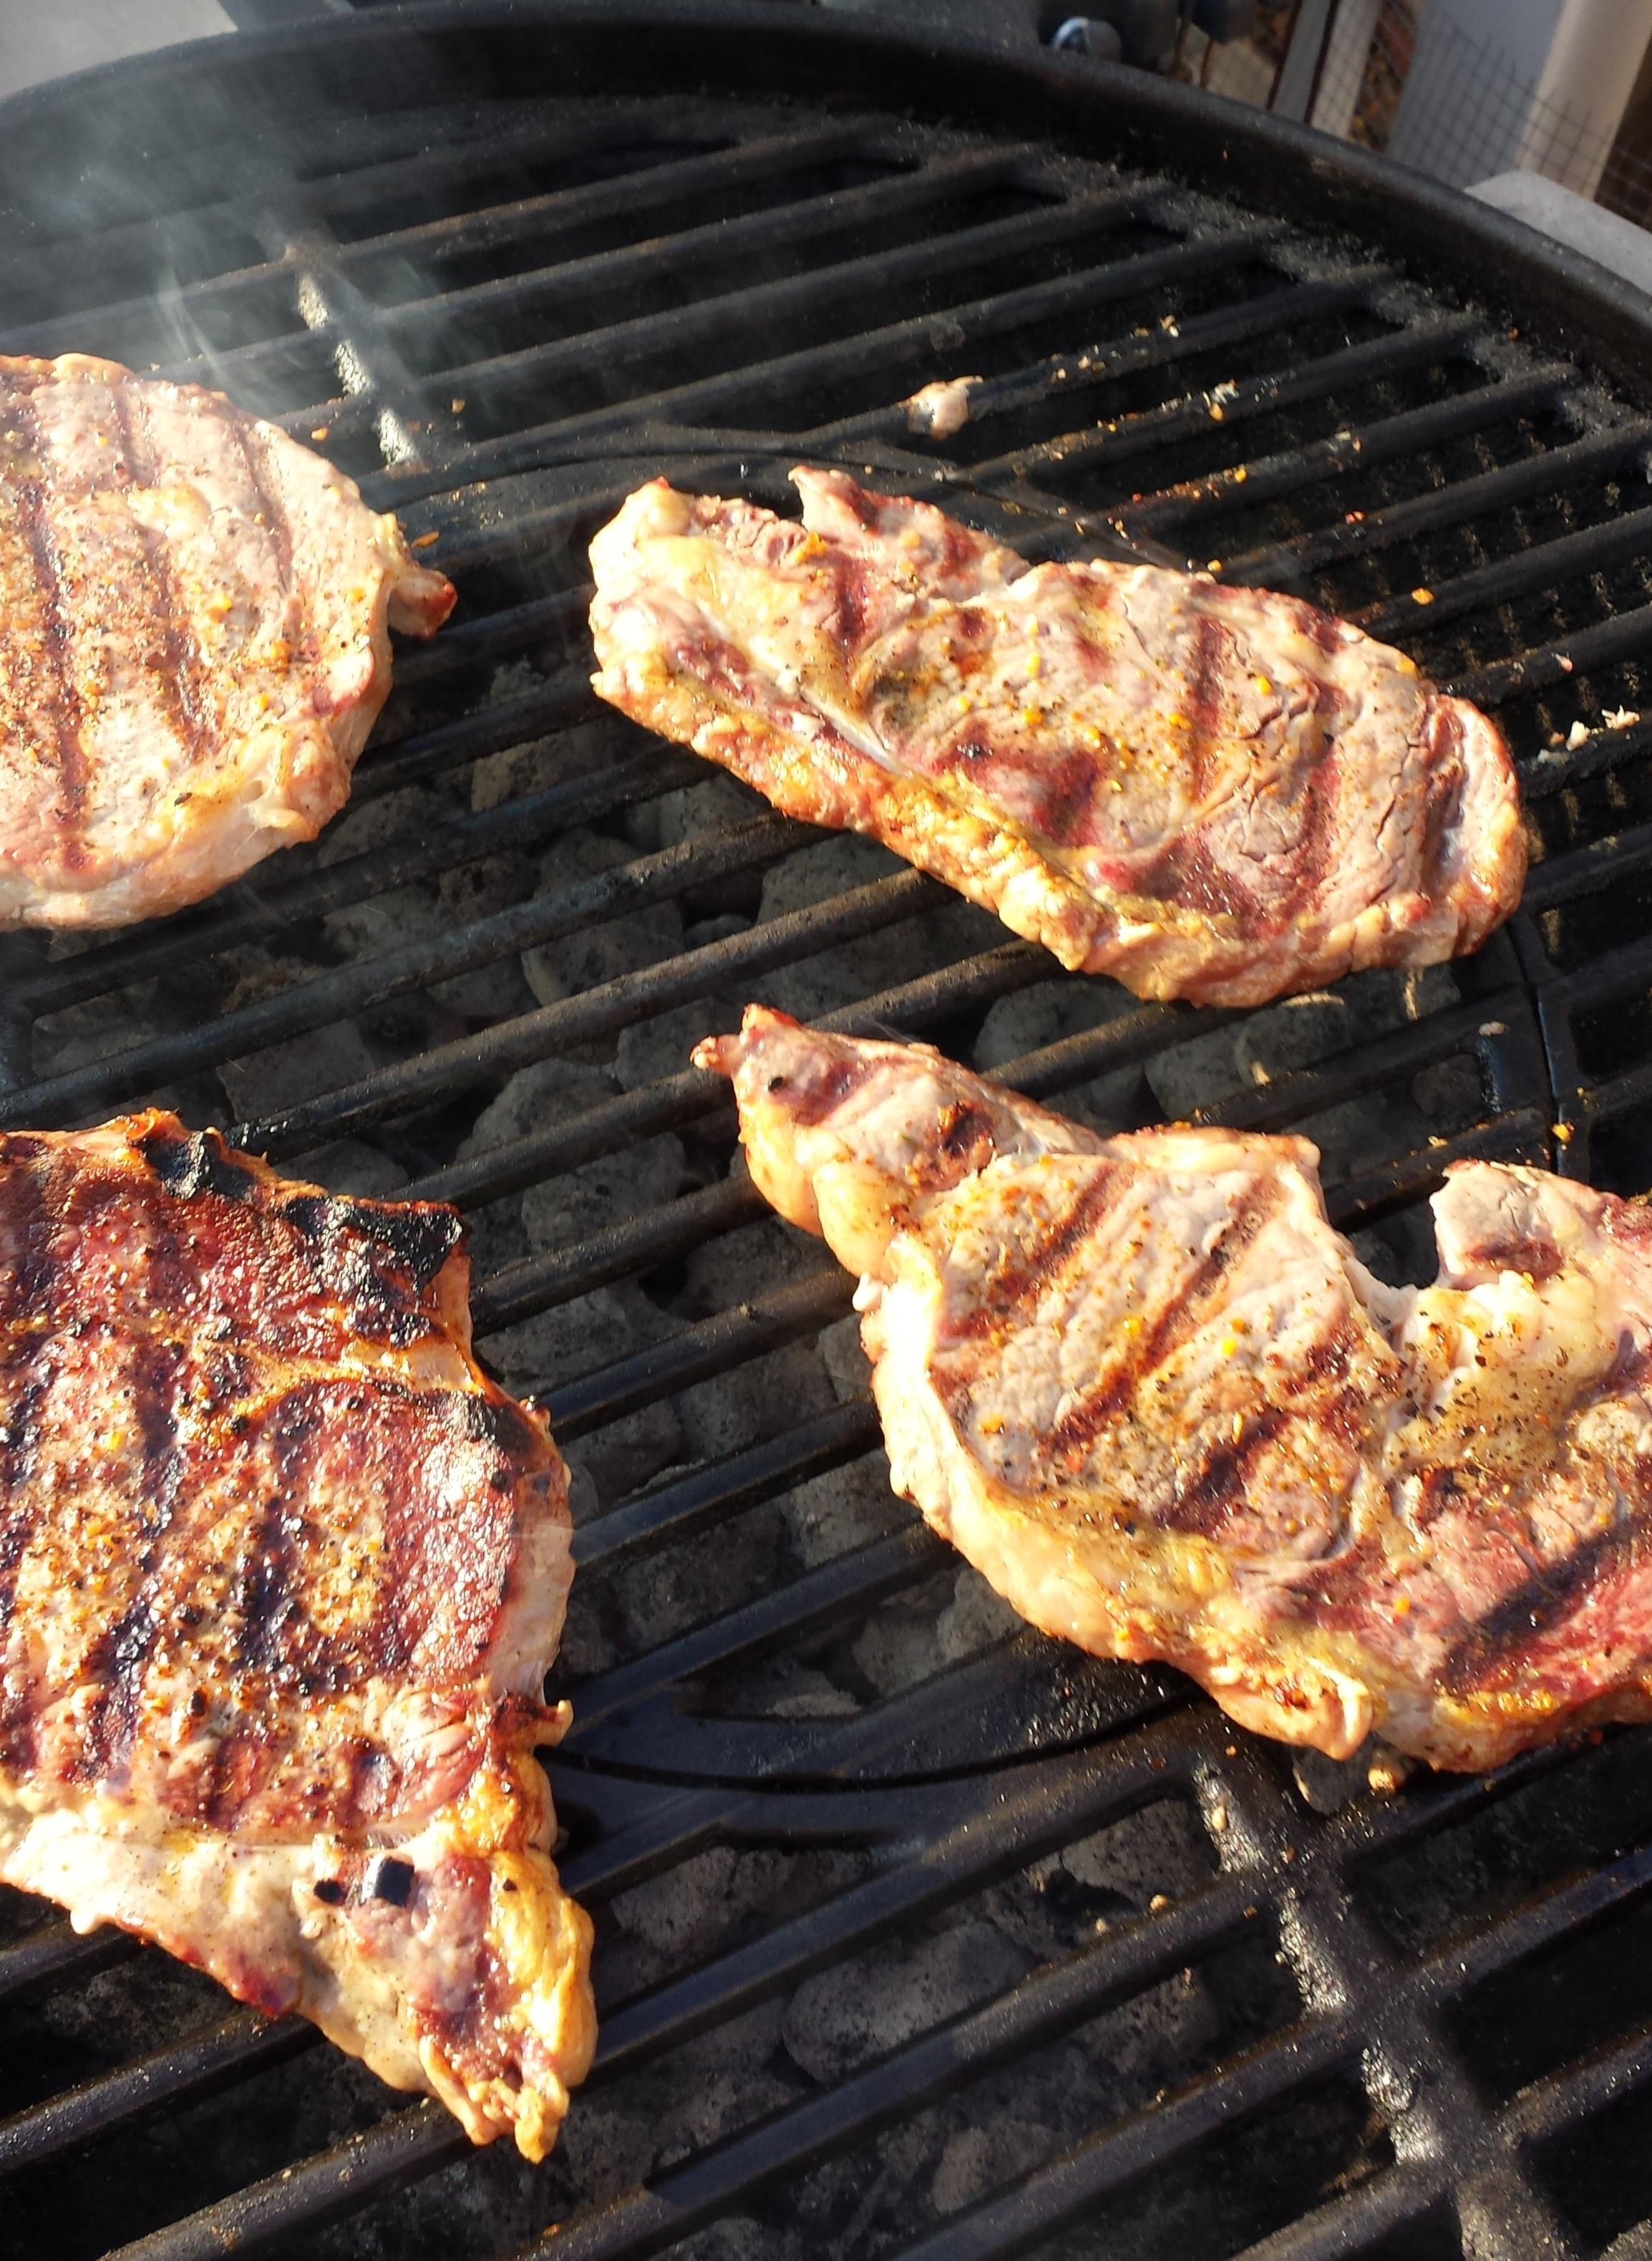
Here I am ready to bring out the goodies. I will replace the lid and the fire will die down and once the temperature riches 350-450 degrees, its ready. During the  time the charcoal was ashing over I have been preparing for our dinner feast.


A-small-little-feast-for-three.

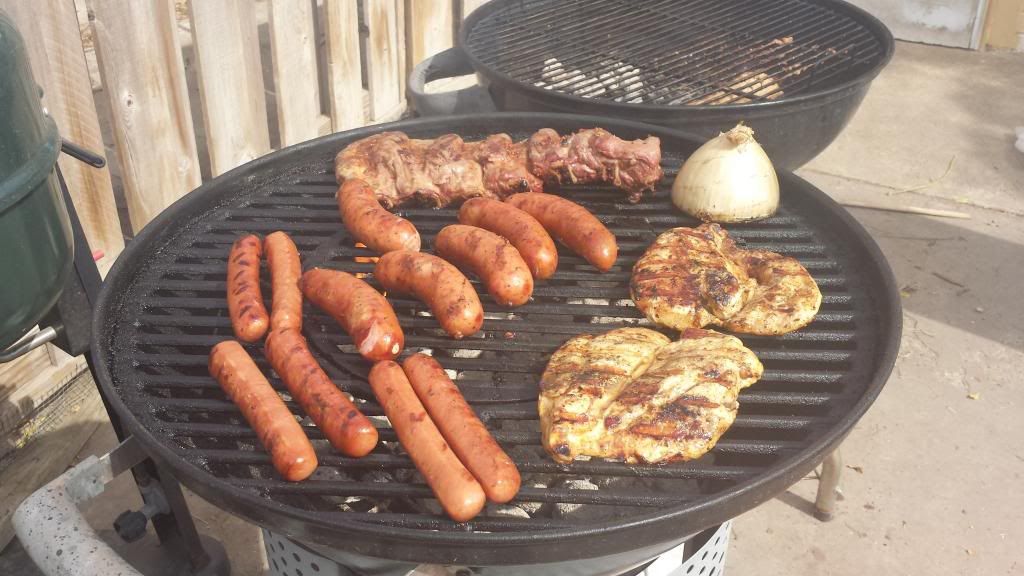
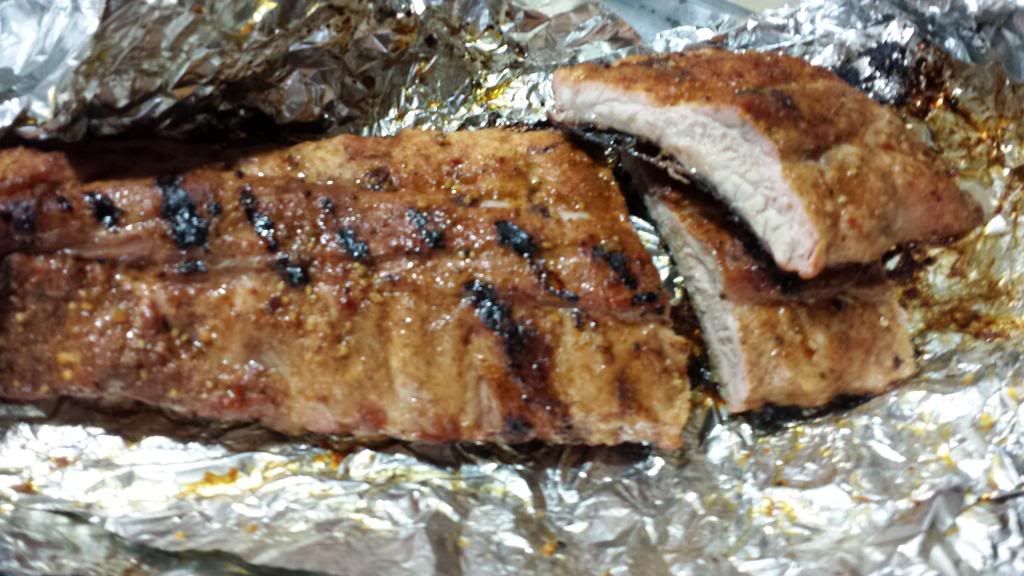
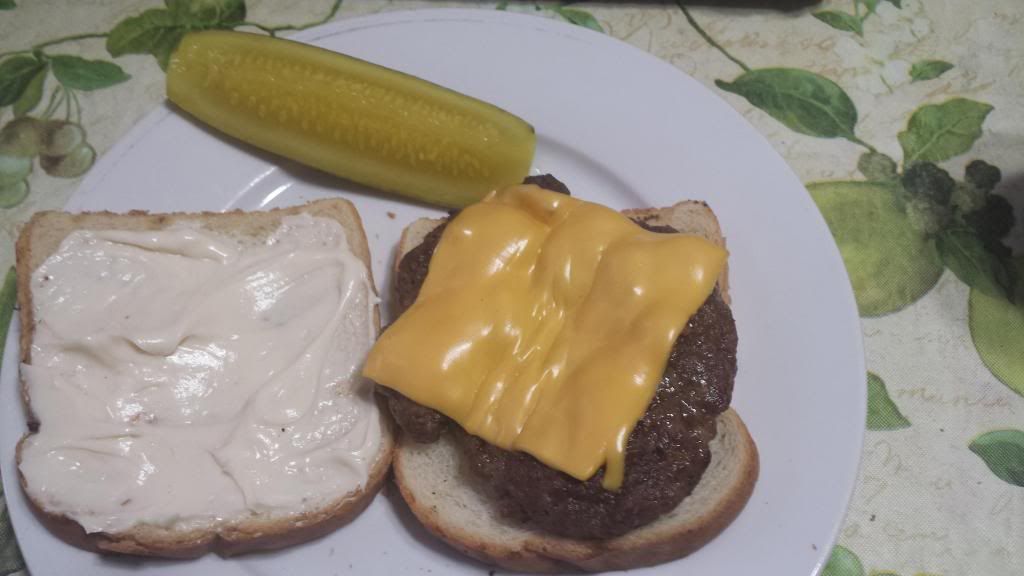
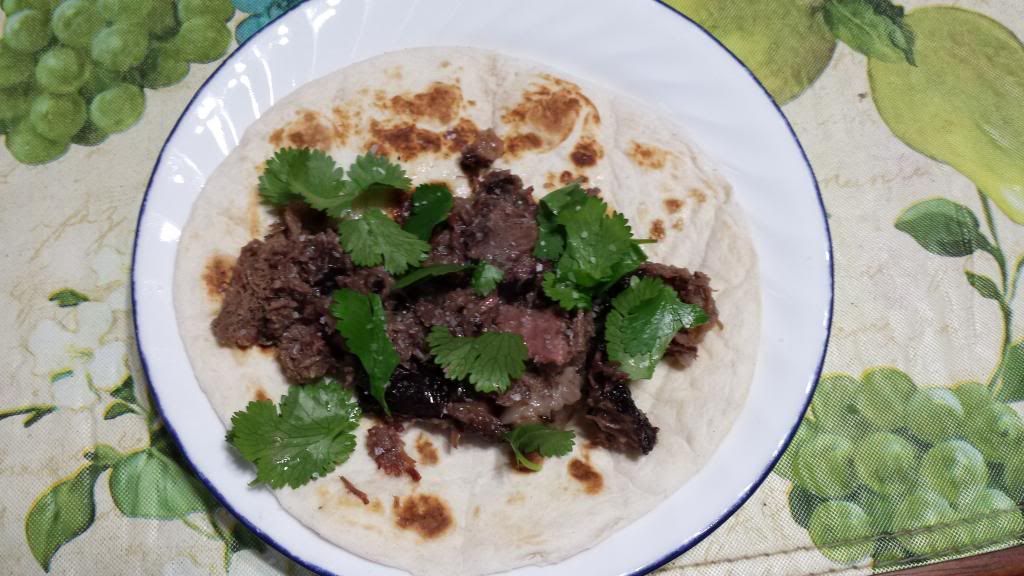
Here it is. Two chicken breasts, a slab of beef ribs, several sausages, and several winners. I had warmed up corn and Bush’s maple beans as sides…oh yes; and tortillas as well.


Fresh-tortillas-on-the-grill.

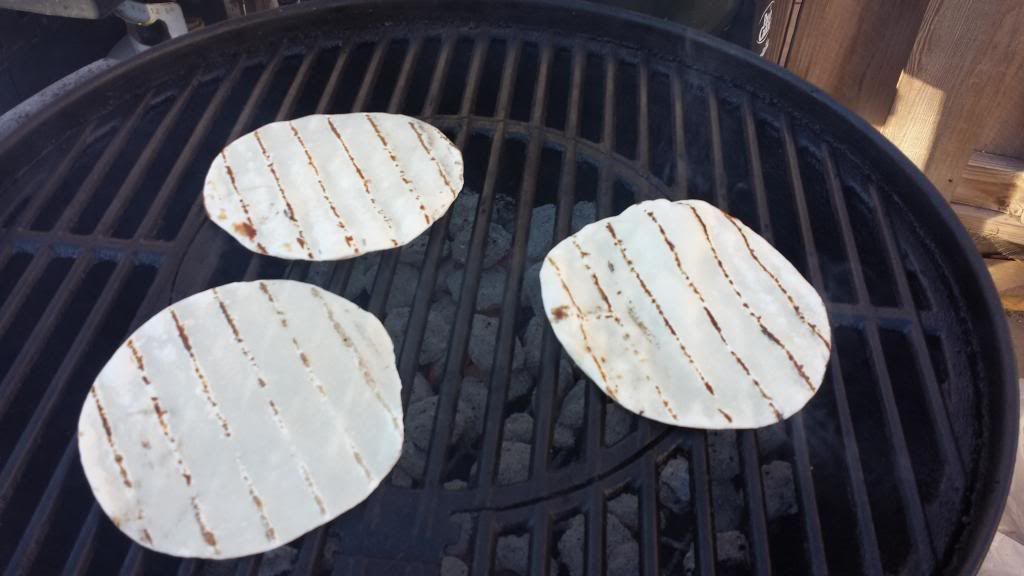
These are store bought uncooked tortillas which come out perfect on the grill and it allows me to taste test the goodies to give the dinner the Chef’s stamp of approval. “This final crucial step is the most important in the whole cooking business.” “I love been the cook of the house!”


“JUST RIGHT BABY…BACK RIBS!”

“JUST RIGHT BABY…BACK RIBS!”

“JUST-RIGHT-BABY…BACK-RIBS!”


Yes baby or that’s right baby! Whichever you like. This slow cooked baby back ribs are just spectacular even without the barbecue sauce! Marinated with a pineapple marinade for just 1 hour and thrown unto the grill with hickory charcoal…and they just melt into your mouth or someone’s who is very lucky! In deed.


FOR THE MARINADE 

For the marinade I used 1 cup of pineapple juice, grated enough lemon zest for 2 tablespoons, 2 tablespoons of freshly grounded black pepper, 2 tablespoons of freshly grounded red pepper, 1 tablespoon coarse salt, 1 tablespoon of garlic power and onion powder. I combined everything and poured it unto the baby back ribs in a shallow dish big enough for the ribs to fit flat and marinated them for 1 whole hour turning over after 35-40 minutes. Put the beefy side down first.


AT THE PIT

After cleaning my barbecue grill I added KINGS FORD Hickory Charcoal and lit up the fire. 30 minutes afterwards I added a couple of hickory chunks and shifted the fire over to one side. Then I cleaned the grill itself with my wire brush and finished it of by rubbing the cooking side of the grill with half an onion. I threw the baby back ribs to the side where there was no coals and grilled it for 1 hour. 40 minutes into the grilling time I flipped them over to its meaty side and wrapped them with aluminum foil in the last 10 minutes tuning the meaty side up. That’s all folks! Enjoy as is or rub a little barbecue sauce if you like. Either way, they are super delicious!


“JUST RIGHT BABY…BACK RIBS!”

Rating: 51

Prep Time: 1 hour

Cook Time: 1 hour

Total Time: 2 hours

Yield: 2

Serving Size: half a slab of baby back ribs

Calories per serving: 490 calories

Fat per serving: 40 grams

“JUST RIGHT BABY…BACK RIBS!”

Super delicious straight off the grill without the added calories of the barbecue sauce! This baby back ribs grilled on hickory coals are really good and tasty!

Ingredients

  • 1 slab baby back ribs
  • 1 cup pineapple juice
  • 2 tablespoons grated lemon zest
  • 2 tablespoons fresh grounded black pepper
  • 2 tablespoons fresh grounded red pepper
  • 1 tablespoon coarse salt
  • 1 tablespoon garlic powder
  • 1 tablespoon onion powder

Instructions

  1. Combine ingredients and marinade baby backs beefy part down for 40 minutes and then turning over for 20 minutes.
  2. Discard marinade and put the baby back ribs in the grill to cook for 1 hour using the indirect cooking method. Cook bones down for 35-40 minutes and turn over beefy side down for 20 minutes. Wrap in aluminium foil in the last 10-15 minutes.
  3. Serve hot off the grill with your favorite beverage and sides. Enjoy!
http://www.smokefirespice.com/just-right-baby-back-ribs/


“SWEET JESUS PORK RIBS”

“SWEET JESUS PORK RIBS”

“SWEET JESUS PORK RIBS”


St. Louis Style Spare Ribs

This St. Louis style spareribs are a real party pleaser! They are super juicy and the meat just falls off the bones! The barbecue sauce is a simple to make and just adds to the rich flavor of the spices and smoke the ribs already has. This type of ribs are cooked over indirect heat with no or little coals underneath for about 1 hour and 10 minutes. 45 minutes with the bones facing down and and the rest on the over side adding barbecue sauce to both sides in the last 15-20 minutes.


Sweet Jesus Sauce

For the sauce I used 1/4 cup of brown sugar, 1/4 cup of thick molasses, 1/2 cup of pineapple juice (can use orange juice also), 1/2 cup ketchup, 2 tablespoons cinnamon powder, 2 tablespoons of red wine vinegar, 1 tablespoon of the following; Cheyenne pepper, freshly ground black pepper, coarse salt, dry mustard, soy sauce, and oregano. Combine all ingredients and simmer for a few minutes stirring occasionally; remove from heat to cool down. What you don’t use you can save in the fridge for later. This sauce goes great not only with pork, but also with chicken.


For the Sweet Jesus Pork Ribs

For the ribs; bring to room temperature and lightly coat with light olive oil. In a bowl combine a tablespoon of the following; Cheyenne pepper, freshly ground pepper, coarse salt, oregano, cinnamon powder, garlic powder, paprika, and 1 tablespoon of grated lemon peel. Mix together and press unto the ribs on both sides. If you have any left over you can save it in a spice shaker for later use.


At the Pit

Hickory-log-for-that-rich-smoky-flavor.

During this time the charcoal should have ashed over. Shift all charcoal to the sides or to one side (depends on how big your grill is) and put a hickory log next to the coals for that rich smoky flavor. You can also use hickory chunks or a small smoke box with soaked hickory chips. Immediately clean the grill with wire brush and for that little extra step; finish cleaning the grill with half an onion. Add the pork ribs and cook as directed in the first steps.


“SWEET JESUS PORK RIBS”

Rating: 51

Prep Time: 30 minutes

Cook Time: 1 hour, 10 minutes

Total Time: 1 hour, 40 minutes

Yield: 2

Serving Size: 1/2 of slab

Calories per serving: 680 calories

Fat per serving: 20 grams

“SWEET JESUS PORK RIBS”

Worth the waiting for this mouth watering-lip smacking-juicy ribs of the 70 minute cook time...don't forget the napkins!

Ingredients

  • 1 slab of St. Louis spareribs
  • 2 tablespoons of light olive oil
  • 1 tablespoon Cheyenne pepper
  • 1 tablespoon fresh ground pepper
  • 1 tablespoon coarse salt
  • 1 tablespoon oregano
  • 1 tablespoon cinnamon powder
  • 1 tablespoon garlic powder
  • 1 tablespoon paprika
  • 1 tablespoon of grated lemon zest

Instructions

  1. Lightly coat ribs with the light olive oil.
  2. Combine and mix dry ingredients in a bowl.
  3. Press unto ribs on both sides.
  4. After shifting the coals to one side and adding hickory chunks, put ribs to the opposite of the heat and grill bone down for 45 minutes. Turn over and grill for 25 more minutes adding barbecue sauce to both sides in the last 15-20 minutes of the grilling time.
  5. Serve with your favorite sides and beverage...enjoy.

Notes

Try not to open the lid while cooking unless flipping or putting on the sauce.If your parked those ribs on the opposite end of the fire and chunks of hickory, your ribs will be just fine.

http://www.smokefirespice.com/sweet-jesus-pork-ribs/

“SIMPLE CHUCK RIBS”

“SIMPLE CHUCK RIBS”


Yes-yes; its a small little feast, but its about the…BEEF!


The Day

The day was perfect. With the temperature hovering at around 64 degrees or so…it was perfect for a late afternoon barbecue. Then again, most days are perfect for grilling; except those days. You know the ones in which the wind is just howling at everything you do. Thank God those days are rare!


Keeping it Simple

Today’s menu called for some chicken wings, drummettes, mixed veggies, and cross cut chuck ribs; and that is what we are after in this post. The simplicity of things is in the preparation; coated with a very light olive oil, coarse salt and freshly grounded pepper. That’s it. As usual, start the grill in advance, clean the grill, and bring the stuff you gonna need closer to the grilling area. While this is not the chicken section, I will say this about the subject…”I’m no chicken.” In a bowl mix about 3 tablespoons of light olive oil and toss around the chicken to coat. Shift over to a plate large enough to set the chicken flat and add a tablespoon each of freshly ground pepper and coarse salt evenly to the chicken making sure to get the seasoning all around. Cover until ready for the grill. For the veggies, all you do is lightly coat grilling plate so that the veggies won’t stick to the grilling surface. Lightly sprinkle fresh ground pepper and coarse salt to taste. I like to do the same to the beef going on the grill as I did the chicken, so that the beef doesn’t stick to the grill.


The Grill

At the grill I always put the chicken a couple minutes earlier then the rest of the meal; it takes longer to cook. Then I add the beef ribs and cook both of them for 10-12 minutes adding the veggies before the half mark of the cooking time. Remember to flip over everything in the halfway mark (5-6 minutes) in this case.  Serve hot with your favorite beverage.


“SIMPLE CHUCK RIBS”

Prep Time: 30 minutes

Cook Time: 10 minutes

Total Time: 40 minutes

Yield: 1 rib

Serving Size: 1

Calories per serving: 260 calories

Fat per serving: 8 grams

“SIMPLE CHUCK RIBS”

Simple and fast beef ribs that will impress anyone!

Ingredients

  • cross cut chuck ribs
  • 1 tablespoon light olive oil per rib
  • salt and pepper to taste

Instructions

  1. Lightly coat ribs with the olive oil.
  2. Add salt and pepper to taste.
  3. Grill for 8-10 minutes turning over at the halfway mark or until desired.
  4. Serve warm with your favorite side dish...or alone. Tastes delicious regardless!

Notes

As always, start the grill in advance. Charcoal normally takes 30 minutes to ash over but is worth the waiting.

http://www.smokefirespice.com/simple-chuck-ribs/


“Holy Steaks Batman!”

“Holy Steaks Batman!”

HOLY-STEAKS-BATMAN!


Steaks at work! Yeah baby! That’s what I’m talking about! We had won a contest and now we were celebrating with grilled sirloin steaks for lunch.


The barbecue pit belongs to one of my friends at work and that is what we normally use because of its size and because it holds heat pretty well. On the menu were just steaks and …more steaks!


As usual, start the fire in advance, we were using Cowboy Mesquite Charcoal which gave off that rich smoky flavor we all have come to enjoy here to my parts.

Friends BBQ Pit; ready for the beef!


The sirloin steaks in the above photo came seasoned from the butcher at a local meat market, so all we had to do is prepare the grill and that was it. A quick marinade for something like this is to mix together 2 tablespoons light olive oil, 1 tablespoon red wine vinegar, 1 crushed garlic, 1 tablespoon paprika, 1 tablespoon fresh black pepper, 1 tablespoon coarse salt, and 3-4 tablespoons juice (orange or pineapple) and mix together. Add steaks for 20-30 minutes or if you have time an hour or 2 will be great. For the grilling times, we cooked them for 15-20 minutes turning over halfway through the grilling time. Keep in mind…the size of that BBQ pit verses what you may own. You may want to move over some of the coals ever so slightly to prevent charring the beef and not allowing the center to cook to your desired tastes. Serve and enjoy!


“Holy Steaks Batman!”

Prep Time: 30 minutes

Cook Time: 20 minutes

Total Time: 50 minutes

Yield: 1 steak

Serving Size: 1

Calories per serving: 728 calories

Fat per serving: 20 grams fat

“Holy Steaks Batman!”

This sirloin steak with its marinade is sure to satisfy any hungry person in your home!

Ingredients

  • 1 sirloin steak
  • 2 tablespoons light olive oil
  • 1 tablespoon red wine vinegar
  • 1 tablespoon crushed garlic
  • 1 tablespoon paprika
  • 1 tablespoon fresh ground black pepper
  • 1 tablespoon coarse salt
  • 3 tablespoons orange or pineapple juice

Instructions

  1. Mix ingredients in a large bowl and add steak to marinate for at least 20-30 minutes.
  2. Discard marinate and grill steak for 15-20 minutes turning halfway through the cooking time over direct medium heat or until done to your desired tastes.
  3. Serve and enjoy.

Notes

The cooking times always varies depending on the size of grill and how hot it is. Keep a sharp eye on the food on the grill and don't be hesitant to actually poke a steak while on the grill to check the color of the juices.

http://www.smokefirespice.com/holy-steaks-batman/


Poor Man’s Cheese Burger…with a Spear of a Pickle.

“Poor Man’s Cheese Burger…with a Spear of a Pickle.”

“Where’s the beef?!”, the old lady yelled…”Well… its at my place in my buns.”  That doesn’t sound too good…does it? Nope! “Okay okay… Poor Man’s Cheese Burger…with a Spear of a Pickle” it is.


Memiors

When I a teenager back in the day, I would get tickled to death by that Wendy’s commercial and that old lady who would pull apart her hamburger buns and shout out loud; “Where’s the beef?!” Hmm, come to think of it…I don’t think I was even in my teens yet? Oh well, in a hundred years who is gonna care anyway.


Why?

“Why call this burger a poor man’s burger?” Well, we all make due with what we have don’t we? At the time of grilling these burgers I only had a pair of hamburger buns, and no tomatoes or lettuce. Not having all the ingredients should not stop us form grilling, in fact; if we were lacking the beef in our burgers…we could have cooked grilled cheese sandwiches. That sounds pretty good to me.


To the Firing Pit…or Grilling Pit.

Remember to start you barbecue pit at least 30 minutes in advance so that the coals ash over before you throw on the beef on the grill. Meanwhile prepare the hamburger beef to make patties. I use the 80/20 hamburger beef; it is tasty and doesn’t shrink as much. So…I have grated about 1 tablespoon of onion “sniff-sniff”, 1 tablespoon of garlic, (keeps vampires at bay…by the way; plus has many benefits), 1/2 teaspoons of the following; paprika, Cheyenne pepper, freshly grounded black pepper, Sweet Baby Ray’s barbecue sauce, and lastly; a dash of coarse salt. You can use any type of barbecue sauce or even omit it all together. That is why it totally rocks to be your own cook! You chose what to add or omit in the recipes.


Baseball-size-patties.


Work it baby

Press the burgers just a little bit bigger then the size of the buns so that when cooked they end up at just the right size as the buns. Mine burgers usually end up being 3/4 to 1 inch thick when cooked. I like pressing them into shape, but you can use a hamburger press if you like.


Off to the grill we go…

These burgers are going to be GOOD!

Cook on a medium to high heat grill for 8 to 10 minutes for medium turning over once past the 5-6 minute mark. Leave a little longer if you don’t want to see any pink juices; about 2-3 minutes longer. Go ahead and toast the buns as well, they taste so much better that way. I finished the hamburger with a 1/2 – 1 tablespoon Miracle Whip and a spear of a pickle.

To Health!…Well I guess that old Wendy’s lady can come back and say…”Where’s the lettuce?!”


Poor Man’s Cheese Burger…with a Spear of a Pickle.

Prep Time: 30 minutes

Cook Time: 10 minutes

Total Time: 40 minutes

Yield: 1

Serving Size: 1 cheese burger

Calories per serving: 750 calories

Fat per serving: 52 grams

Poor Man’s Cheese Burger…with a Spear of a Pickle.

This cheese burgers are really not poor at all...they are rich...rich in flavor that will make beggars of the people who eat them. "I want more please!"

Ingredients

  • 1 tablespoon of grated onion
  • 1 tablespoon of grated or chopped garlic
  • 1/2 tablespoon Cheyenne pepper
  • 1/2 tablespoon freshly ground black pepper
  • 1/2 tablespoon paprika
  • 1/2 tablespoon of Sweet Ray's barbecue sauce or other
  • 1/2 tablespoon coarse salt
  • 1/2 pound of 80% ground beef
  • 1 slice of your favorite cheese
  • 1 pickle spear

Instructions

  1. Combine all ingredients into a large bowl and mix together forming into a ball shape and press flat to a size a little bit bigger then the hamburger buns.
  2. Cook over direct heat for 8-10 minutes for medium turning once past the 5-6 minute mark.
  3. Place hamburger buns on grill and the slice of cheese on top of the patty in the last minute of grilling to lightly toast and melt the cheese.
  4. Remove patties and buns from grill and prepare buns by lightly applying Miracle whip or other chosen dressing.
  5. Garnish with A pickle and enjoy!

Notes

The prep time is the waiting time for the coals to ash over, so start that process first. I have clocked myself in the prepping time for the patties at around 10 minutes and 20 minutes taking my sweet time.

http://www.smokefirespice.com/poor-mans-cheese-burger-with-a-spear-of-a-pickle/

Super Sweet Fully Loaded New York Steak

“Super Sweet Fully Loaded New York Steak!”


This is a super sweet fully loaded New York Steak that is really easy to grill.


As usual, start up that grill at least 30 minutes in advance to get those coals ashing over. For this dish I used alder chips that were soaking in water for 10 minutes. This prevents the chips from burning up too quickly and allows them to smoke for a longer period. I don’t add those wood chips until I am ready to throw those New York steaks on the grill.

Getting the grill ready ahead of time allows coals to ash over.


Meanwhile, I oiled, spiced, and let those steaks reach room temperature before hitting the grill. Having the steaks reach room temperature will speed the cooking process and will allow the steaks to cook more thoroughly.  The oil gives the steak a little flavor as well and prevents them from sticking to the grill. I use about a tablespoon of light olive oil and sprinkled some of McCormick’s Grill Mates spice. The chosen one for today was Smokehouse Maple which I pressed onto the steaks with the sides of a kitchen knife. I only trimmed one steak though for a picky person.

Lightly oiled, spiced, and trimmed New York Steak.


After the coals had ashed over and I added the soaked alder wood chips I threw the steaks on the grill for 7 minutes turning only once after the 4 minute mark. As a side, I had split lengthwise, oiled, and seasoned some zucchini with some salt and pepper.


Super Sweet Fully Loaded New York Steak

Rating: 51

Prep Time: 30 minutes

Cook Time: 7 minutes

Total Time: 37 minutes

Yield: 1

Serving Size: 1

Calories per serving: 650 caloties

Fat per serving: 26 grams

Super Sweet Fully Loaded New York Steak

This New York steak recipe is sure to be a real treat to any beef lover's taste buds!

Ingredients

  • New York Steak 12 oz
  • McCormick's Grill Mates Smokehouse Maple
  • 1 tablespoon light olive oil
  • salt and pepper to taste
  • 1 zucchini

Instructions

  1. Bring steak to room temperature, lightly oil,and sprinkle seasoning pressing them onto the steak with the side of kitchen knife or back of spoon.
  2. Cut zucchini lengthwise and lightly oil and season with salt and pepper.
  3. After coals ash over, throw in water soaked wood chips on grill and place steaks and zucchini on grill allowing room in between them.
  4. Cover grill and cook for 7 minutes; 4 on 1 side and turn over for the remaining last 3 minutes. This is for medium well, so adjust your timing to your desired tastes. Enjoy!
http://www.smokefirespice.com/super-sweet-fully-loaded-new-york-steak/


Barbacoa…Juicy beef tongue and cheeks taco with cilantro.

“Barbacoa…Juicy beef tongue and cheeks taco with cilantro.”


Barbacoa…Juicy beef and cheeks taco with cilantro.


Memoirs

Eating barbacoa always reminds me of my father (Reyes), who would dig a huge hole and light up a mesquite fire. He would let the mesquite flames die out, let the mesquite turn to red hot coals, and would lower a metal canister with a cows head wrapped in aluminum foil. He would cover the hole with metal sheets and throw dirt over them to keep in the heat. Let that sit overnight for some tasty barbacoa in the morning.


Days like those I considered a special occasion day. Kind of like Thanksgiving Day which as we all know only comes once a year…at least to my knowledge anyway. With me, I make barbacoa once every 3 months; unless my little Princess asks for some earlier.


Prepping 

To the meal preparation we go. I like to rinse the beef tongue and cheeks in cool running water until clean, while the coals in my smoker are ashing over. I add a little coarse salt, freshly ground pepper, and for this dish I added a sprinkle of dry parsley. That’s it. It goes directly in the top sections of my smoke box, which I had started 30 minutes in advance with charcoal.

Beef-tongue-and-cheeks.


Smoking

I added hickory logs for that smoky flavor afterwards and smoked the beef for 5 hours. This is how it looks after that time. Note that some smokers normally put a bowl of water underneath to keep in moisture, but I don’t because these types of beef holds a lot of water in them, even after 7-9 hours of smoking.

“Damn I’m getting hungry!”


Slow

After the smoking, I cooked the beef for 7 hours in the slow cooker. In the slow cooker I added water to cover, set the dial to low, and by breakfast time it was ready.

After 7 hours in the slow cooker.


I strained the beef tongue and cheeks to remove as much water from them, removed the tongue’s skin or outer layer with a fork and tongs and discarded.

Skin or outer layer of tongue.


Check out that color.


I then used two knifes to shred both tongue and cheeks. “If only Edward was here!”  “From Edward Scissor Hands.” lol

Barbacoa time!


I add some more coarse salt to taste and chopped some cilantro to add to the tacos. You can eat this with either corn or flour tortillas; even by itself it taste so good. Call up the family, its dinner time! “I mean…its breakfast time!”

Who said beef was only for dinner anyway?

Barbacoa…Juicy beef tongue and cheeks taco with cilantro.

Rating: 51

Prep Time: 30 minutes

Cook Time: 12 hours

Total Time: 12 hours, 30 minutes

Yield: about 40 fully loaded tacos

Serving Size: 1 tortilla fully loaded with barbacoa and cilantro

Calories per serving: 250 calories

Fat per serving: 12 grams

Barbacoa…Juicy beef tongue and cheeks taco with cilantro.

These is a super easy and totally delicious dish to create that will impress any food picky person. The rich flavor from the smoke of hickory leaves a slight bacon flavor and an unforgettable taste that will have people coming back for more.

Ingredients

  • coarse Kosher salt
  • parsley flakes
  • black pepper
  • 1 package of beef cheeks
  • 1 beef tongue
  • enough chopped cilantro to fill a small bowl
  • tortillas; corn or flour your choice

Instructions

  1. light up smoker with charcoal or hickory logs
  2. Wash beef tongue and cheeks under cool water until clean.
  3. Season beef with salt, fresh ground pepper, and parsley flakes.
  4. Put on top section of smoker when charcoal ashes over for 5 hours and add hickory logs or chips to your coals.
  5. After 5 hours put beef in slow cooker, cover with water, and cook for 7 hours.
  6. Remove tongue skin and combine both tongue and cheeks in bowl and shred.
  7. Add salt to taste.
  8. Warm up tortillas and add barbacoa and cilantro; enjoy!
http://www.smokefirespice.com/barbacoa-juicy-beef-tongue-and-cheeks-taco-with-cilantro/


5 things you must control at all times!

Smoke, Fire, Heat…Here’s Woody!

5 things that you must control at all times!


“He that controls the spice controls the universe,” maybe in the movie Dune, but here in the real world, the Chef that controls any or all of these five things smoke, fire, heat, spices, and /or herbs, controls the total outcome any prepared meal.


Having received the book Dune while in the desert was a very unusual thing for me. The book had no cover and was addressed to “any service member” and had a small note that read “…it is very ironic to send you this book considering you are in fact in the desert.” I could not help but to laugh at that and pick that book to read in those moments in which I had the chance. I really did get to like the novel and after the war ended and I arrived home in the States I looked up the movie and is one of my old time favorites.


Moving on then…here are the “5 things you must control at all times!” There are smoke, fire, heat, spices, and herbs. I will talk about the first three now, but the last two will have there own sections in this blog because the information about them is totally overwhelming for just one or even a few posts. There are so many different spices and herbs that can add different and delicate flavors to any dish, not to mention there medicinal benefits.


SMOKE…Throughout time it has had many uses. The Indians have used it to send signals to its tribesmen also the Chinese where known to do so as well. The Roman Church uses smoke signals to tell the people of a new Pope and the American Boys Scout still uses them to signal others as well. “WOW!” Not to mention that smoke has been used to  cure foods to make them last longer and also to give flavor.


That use of smoke for flavor and cooking…like smoking large portions of beef or getting that bacon maple flavor to hams is what I am more interested in. Smoking can be for as little as half an hour, to 7-8 hours for smoked rings on briskets; whole hams can be smoked to as much as a whole day. The recommended internal temperature for any pork is between 145-150 degrees Fahrenheit at minimum since pork may contain worms that can cause the disease trichinosis. I normally smoke my beef and pork for 7-8 hours at a temperature of 170-300 degrees Fahrenheit adding fresh moist wood chunks or chips when the smoke starts to turn dark instead of white.


You don’t really need a smoker to achieve the simple recipes, but I would suggest investing in a decent smoker for briskets, hams, or large portions of meat. They will do a better, easier job for you and you will not forget the final results. As for the simpler cuts, you can cut open a beer can or any aluminum can for that matter and put in some soaked chips. You can even use aluminum foil with small holes made on the top to vent out the smoke. As the water in the chips evaporates, you will get smoke to add more flavor to your dishes. An even better alternative is a small cast iron smoke box that fits inside your grill or you can even add liquid smoke which works excellent as well.


The overall result of flavor always depends on the type of wood that you use and for how long you smoke your cuts. Whether you are smoking or grilling, here are some of the woods you can use for that exquisite flavor.

hickory, mesquite,apple,cherry, alder...
Here’s Woody!

Hickory; is an excellent choice of wood for grilling or smoking things like pork, wild game, chicken, and beef. I even have heard that it works great on some cheeses, “though I have never tried it before…there is always a first time for everything.” Hickory gives food a bacon-like type of flavor. “Who doesn’t like bacon?”


Mesquite; here where I am from the chosen wood is mesquite; a local tree that is abundant to our parts of the South. Its hard wood gives food a big bold delicate flavor which is excellent for beef, lamb, and many vegetable dishes. Because mesquite burns really hot I suggest you leave an area below the grill with very few burning ambers to shift your food over just in case it gets too hot on the other side.


Apple; gives off a sweet and fruity flavor which goes good with game birds to include chicken and turkey. Apple is also good for beef and pork especially cuts of ham. I suppose you can even save apple cores and air dry them to throw on top of the coals too.


Cherry; also gives off the same characteristics as apple, but apple tends to be more dense then cherry. Also, good for the same food groups as apple.


Alder; has a delicate flavor good for many different types of fish, chicken, and pork.


Lemon and lime wood; I like to add when grilling or smoking many types of fish. I even use the peels of lemons or lime to give fish that little extra kick.


Whatever woods you use or if you just use charcoal; make sure to let the fires die down a bit unless you like charred food. If you don’t you can shift the fire over to a side and cook on the opposite side. Best of luck!


Kings Reyes C.


Hot & Juicy Rib-eye Steaks Grilled over a Mesquite Fire.

hot-juicy-grilled-rib-eye steak
Hot Juicy Rib-eye Steak grilled over a mesquite fire with mash potatoes and Red Lobster biscuits.


“Hot and juicy coming off the grill and grilled over mesquite coals after the fire died down a bit. ” This is 14 ounce of pure joy ; a rib-eye steak cooked medium to medium well or until the juices run a slight pink. Served with mashed potatoes and Red Lobster biscuits with a biscuit recipe that my little girl picked from an unknown source.


I like to add butter and a little bit of buttermilk to my mashed potatoes and season with salt and pepper to taste. At times I might even add a sharp cheddar cheese, but not this time. While this is not a side dish blog, I might add the recipes for the sides if people request for them.


McCormick-Grill-Mates-Smoke House-Maple-spice
McCormick Grill-Mates;Smoke House Maple seasoning.

About those steaks…I always get my beef to room temperature; it speeds cooking times. For this four steaks I coated them with extra virgin olive oil (about a tablespoon for each), I sprinkled and pressed Grill Mates Smoke House Maple seasonings by McCormick’s and sea salt on them with the backside of a spoon so the seasonings won’t fall off as easily when they hit the grill. I really enjoy using McCormick’s Grill Mates because I don’t have to mix and create my own, though I do at times. It depends on the mood I am in and if I’m not in a hurry.


MY STOK GRILL
MY STOK GRILL

Meanwhile, I have arranged charcoal in my STOK grill in a pyramid shape and added lighter fluid. Let the fluid soak at least 5 minutes before lighting the coals up.  When the coals ashes over (normally 30 minutes)it is ready for the next step. Spread coals evenly and add mesquite chucks for that extra flavor. You can use soaked mesquite chips as well. Needless to say, even using charcoal can add great flavor and you can buy it with mesquite or hickory in them already. Most of the times I use straight charcoal because mesquite is readily available where I am from and using chucks of your chosen wood really adds a more concentrated smoky flavor. Close the lid and let the grill heat up to 400-500 degrees Fahrenheit.


I can't wait to be eaten rib-eye steaks!
I can’t wait to be eaten rib-eye steaks!

You are now ready to grill those steaks to perfection. Bring them to your grilling station along with everything you might need like a plate, fork, knife, something to grasp those steaks to flip them over, and a couple of beers to drink while you wait for the steaks to get done. “Okay-okay, it doesn’t have to be beers.” You can take soda or H2O (water) instead. Point is it won’t take those steaks a long time to cook and you do not want to leave them alone in case of flare ups.  Mine took about 11 minutes (give or take 30 seconds); 6 minutes on one side and 5 on the other is all it takes.


Hot juicy rib-eye steaks in the making!

The time always depends on factors; like how well you like those steaks to be done, the temperature of your grill, and whether you use a lid or not on your grill. I almost always do because it prevents flare ups and really speeds up the cooking time. Keep in mind that the steaks will continue to cook even after you take them out of the grill so be careful not to over cook them. You can not add moisture back into cooked food, but you can coat them with sauces so they won’t be too dry. What I recommend is investing in a meat thermometer or checking your steak in the last few minutes of the cooking time so that you can pull it off the grill when you decide when it is done to your satisfaction.


Hot & Juicy Rib-eye Steaks Grilled over a Mesquite Fire.

Rating: 51

Prep Time: 10 minutes

Cook Time: 11 minutes

Total Time: 21 minutes

Yield: 1

Serving Size: 1

Calories per serving: 847

Fat per serving: 28 grams

Hot & Juicy Rib-eye Steaks Grilled over a Mesquite Fire.

A rib-eye steak cooked over the coals of mesquite has a very rich flavorful taste that you, your family or friends won't easily forget.

Ingredients

  • 1 14 ounce rib-eye steak
  • 1 tablespoon of extra virgin olive oil
  • 1 tablespoon of McCormick's Grill Mates Smoke House Maple Seasoning
  • 1/2 tablespoon sea salt

Instructions

  1. Bring rib-eye steak to room temperature and coat both sides with the 1 tablespoon of extra virgin olive oil.
  2. Mix sea salt and seasoning together and press onto both sides of rib-eye steak with the back side of a spoon.
  3. When the charcoal has ashed over in the barbecue pit, arrange steaks on grill so that they are not touching each other and close the lid on the grill.
  4. Cook for 11-12 minutes for medium to medium well and for 13-15 minutes for well or until your desired result is achieved.
  5. Serve with your favorite side dish or enjoy by itself!

Notes

The cooking time varies due to grill size and the temperature of your grill. You can check your steak by making a slight slit in the steak and checking for the right color int your steak. Also, you can use a meat thermometer, most have a gauge that tells you to what degree a steak is done.

http://www.smokefirespice.com/hot-juicy-rib-eye-steaks-grilled-over-a-mesquite-fire/


Well I hope you enjoy your rib-eye steak like I enjoyed mine. I’ll try to get better pictures in the future. At the moment I think they are alright considering I took them with my camera in my phone. If you would like to leave a comment or your favorite way to prepare and grill a rib-eye steak; be our guest and do so.


Thanks,

  Kings R. C.